Remotes in GitHub
Last updated on 2024-03-12 | Edit this page
Overview
Questions
- How do I share my changes with others on the web?
Objectives
- Explain what remote repositories are and why they are useful.
- Push to or pull from a remote repository.
Version control really comes into its own when we begin to collaborate with other people. We already have most of the machinery we need to do this; the only thing missing is to copy changes from one repository to another.
Systems like Git allow us to move work between any two repositories. In practice, though, it’s easiest to use one copy as a central hub, and to keep it on the web rather than on someone’s laptop. Most programmers use hosting services like GitHub, Bitbucket or GitLab to hold those main copies; we’ll explore the pros and cons of this in a later episode.
Let’s start by sharing the changes we’ve made to our current project with the world. To this end we are going to create a remote repository that will be linked to our local repository.
1. Create a remote repository
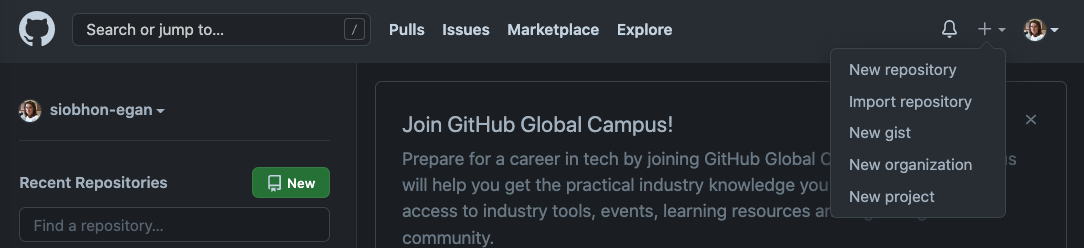
Log in to GitHub, then click on the icon in the top right corner to create a new repository.
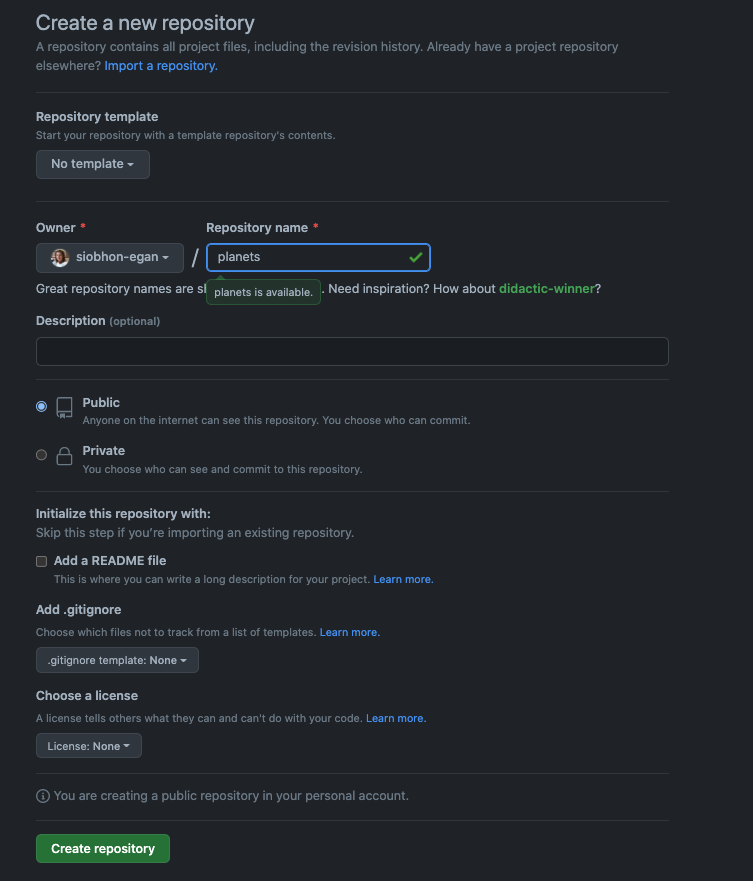
Name your repository planets and then click “Create Repository”.
Note: Since this repository will be connected to a local repository, it needs to be empty. Leave “Initialize this repository with a README” unchecked, and keep “None” as options for both “Add .gitignore” and “Add a license.” See the “GitHub License and README files” exercise below for a full explanation of why the repository needs to be empty.
As soon as the repository is created, GitHub displays a page with a URL and some information on how to configure your local repository:
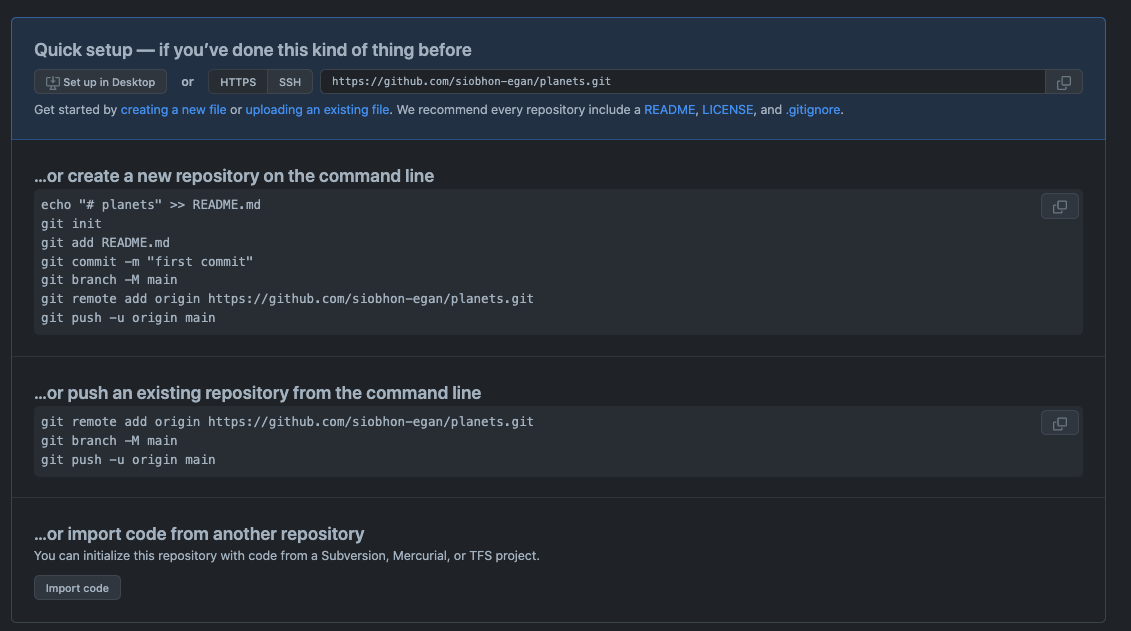
This effectively does the following on GitHub’s servers:
BASH
mkdir planets
cd planets
git init
If you remember back to the earlier episode where we added and committed our earlier work on mars.txt, we had a diagram of the local repository which looked like this:

Now that we have two repositories, we need a diagram like this:

Note that our local repository still contains our earlier work on mars.txt, but the remote repository on GitHub appears empty as it doesn’t contain any files yet.
2. Create a personal access token
🔗 Offical GitHub documentation
You can access repositories on GitHub from the command line in two ways, HTTPS and SSH, and both have a different way of authenticating. The method of authenticating is determined based on whether you choose an HTTPS or SSH remote URL when you clone the repository. For more information about which way to access, see “About remote repositories.”
Connecting to a repository will look like either:
- A HTTPS URL like https://github.com/user/repo.git - You can work with all repositories on GitHub over HTTPS, even if you are behind a firewall or proxy.
- A SSH URL, like git@github.com:user/repo.git - You can work with all repositories on GitHub over SSH, although firewalls and proxies might refuse to allow SSH connections.
In this workshop we will use the HTTPS option and connect using a “personal access token (PAT)”.
Git associates a remote URL with a name, and your default remote is usually called origin.
When you git clone, git fetch, git pull, or git push to a remote repository using HTTPS URLs on the command line, Git will ask for your GitHub username and password. When Git prompts you for your password, enter your personal access token (PAT). Alternatively, you can use a credential helper like Git Credential Manager. Password-based authentication for Git has been removed in favor of more secure authentication methods. For more information, see “Creating a personal access token.”
If you are accessing an organization that uses SAML SSO, you must also authorize your personal access token to access the organization before you authenticate. For more information, see “About authentication with SAML single sign-on” and “Authorizing a personal access token for use with SAML single sign-on.”
To get this processing going quicker we will get started by creating our own repositories and cloning them to the local machine.
Create Personal Access Token
🔗 Offical GitHub documentation
Personal access tokens (PATs) are an alternative to using passwords for authentication to GitHub when using the GitHub API or the command line.
- Verify your email address, if it hasn’t been verified yet.
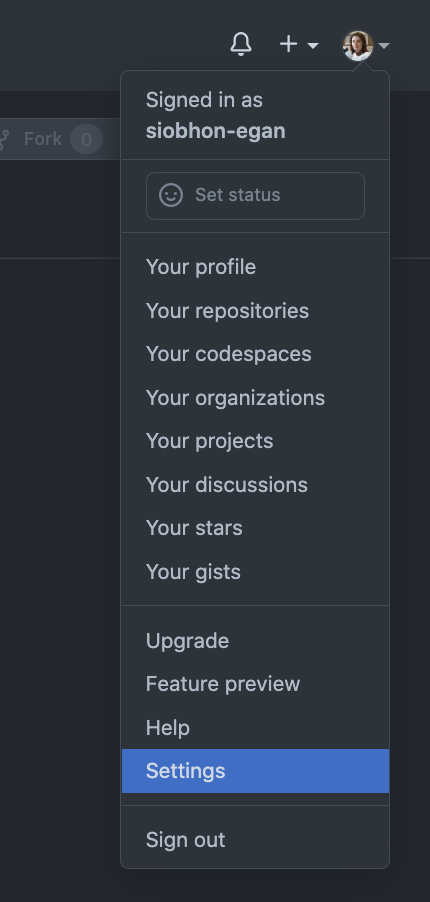
- In the upper-right corner of any page, click your profile photo, then select “Settings”.
- In the left sidebar, select “Developer settings” (at the bottom of the list.
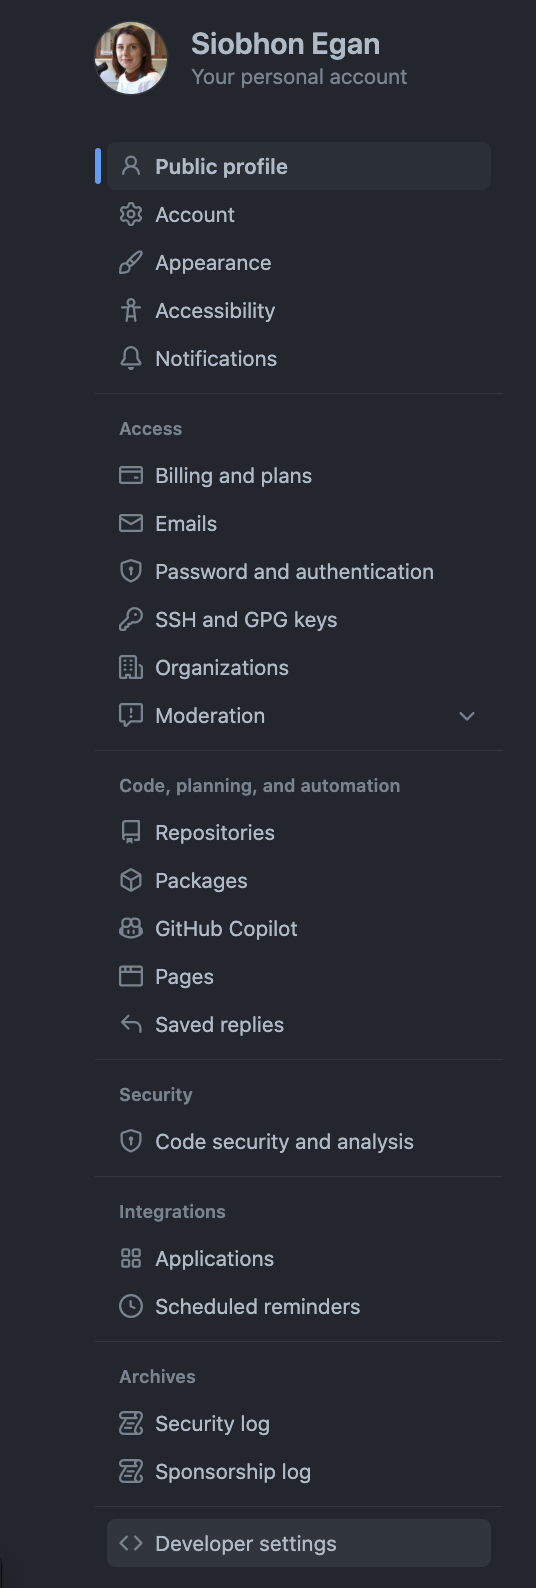
- In the left sidebar, select “Personal access tokens”.
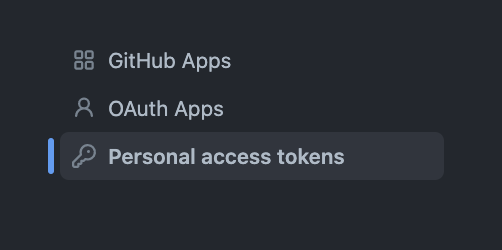
- select “Generate new token”.

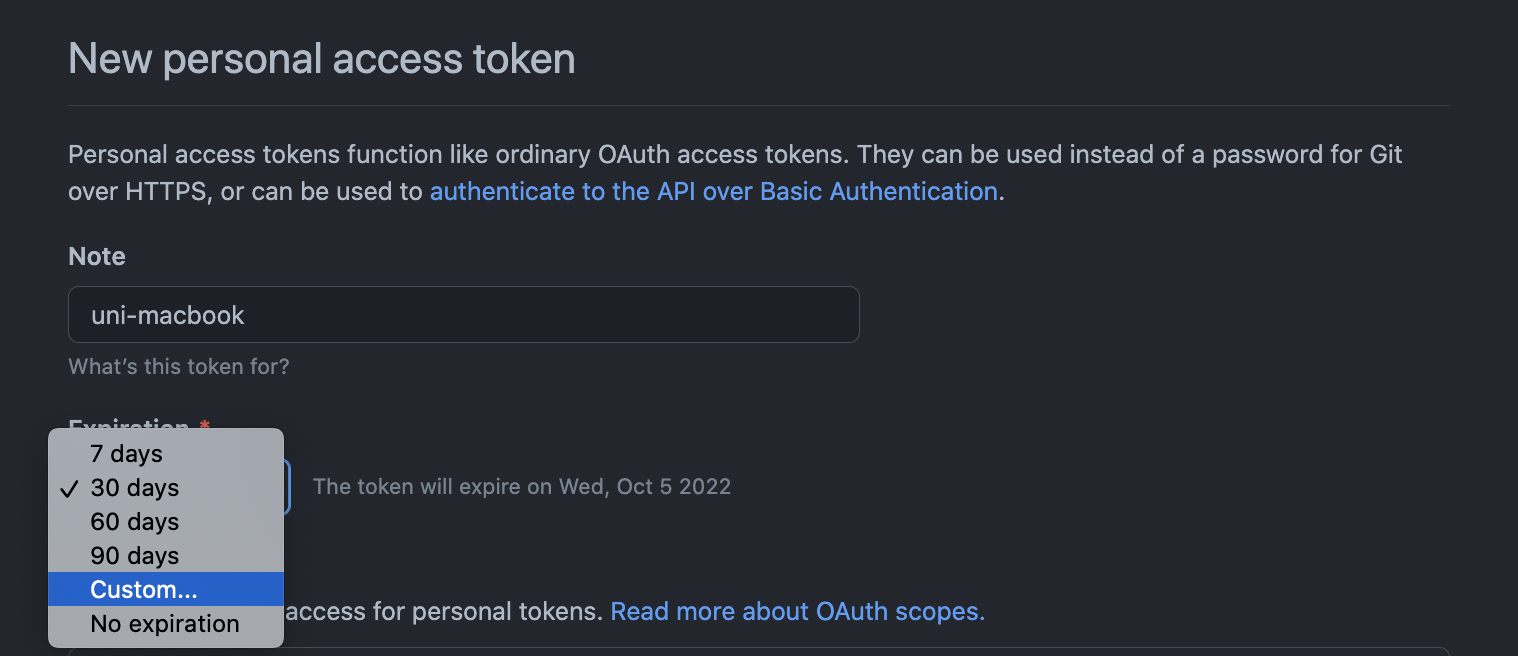
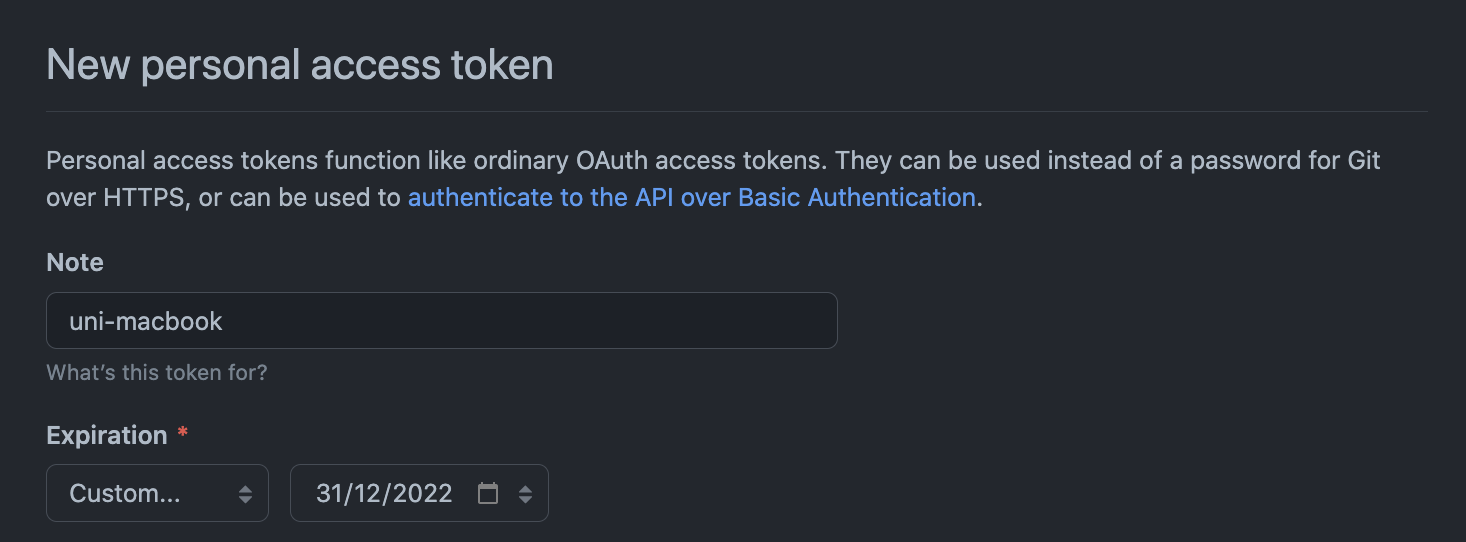
- Give your token a name - e.g. I used “uni-macbook” in this example.
- You need to provide an expiration for the token. It’s a personal choice but I suggest selecting something > 1 month. You may want to re-visit this tutorial in 2 weeks time for example and it will help you if your token is still valid. I suggest you select the Expiration drop-down menu and choose “custom”, then click a default or use the calendar picker (In the example below I selected end of the year 2022 for expiry)
- Select the scopes, or permissions, you’d like to grant this token. To use your token to access repositories from the command line, select repo.
-
Suggested options for selection:
- ✅ repo
- ✅ workflow
- ✅ admin:repo_hook
- ✅ gists
- ✅ notifications
- ✅ user
- ✅ project
- Click Generate token.

Once you have a token, you can enter it instead of your password when performing Git operations over HTTPS.
3. Connect local to remote repository
Now we connect the two repositories.
We do this by making the GitHub repository a remote for the local repository. The home page of the repository on GitHub includes the URL string we need to identify it:

Make sure you copy the HTTPS URL for cloining
Copy that URL from the browser, go into the local planets repository, and run this command:
BASH
git remote add origin https://github.com/vlad/planets.gitMake sure to use the URL for your repository rather than Vlad’s: the only difference should be your username instead of vlad.
origin is a local name used to refer to the remote repository. It could be called anything, but origin is a convention that is often used by default in git and GitHub, so it’s helpful to stick with this unless there’s a reason not to.
We can check that the command has worked by running git remote -v:
BASH
git remote -vOUTPUT
origin   https://github.com/vlad/planets.git (fetch)
origin   https://github.com/vlad/planets.git (push)
Securly Storing Your Personal Access Token
As a PAT is used in place of your password by default it will need to be re-entered whenever you push to the remote GitHub repository. It is recommended you use a password manager to store these credentials.
When your PAT expires you will need to ensure you update these saved credentials.
If you are not prompted for your username and password, your credentials may be cached on your computer. You should update your credentials to replace your old password with the token.
When you first push to the GitHub repository, you will be asked for a username and password. Provide your GitHub account username as the username and the PAT as the password. Once Git has successfully connected with the remote repository, the PAT will be automatically added to the Mac Keychain Access app. After this, there is no need to re-enter the PAT for future clone, push or pull actions.
If you need to update the credentials stored in the Mac Keychain Access app, these instructions are useful.
Alternatively you can use GitHub CLI or Git Credential Manager (GCM) to remember your credentials.
For Windows, the recommended option is to use the Git Credential Manager (GCM), which is included with GitBash (Git for Windows).
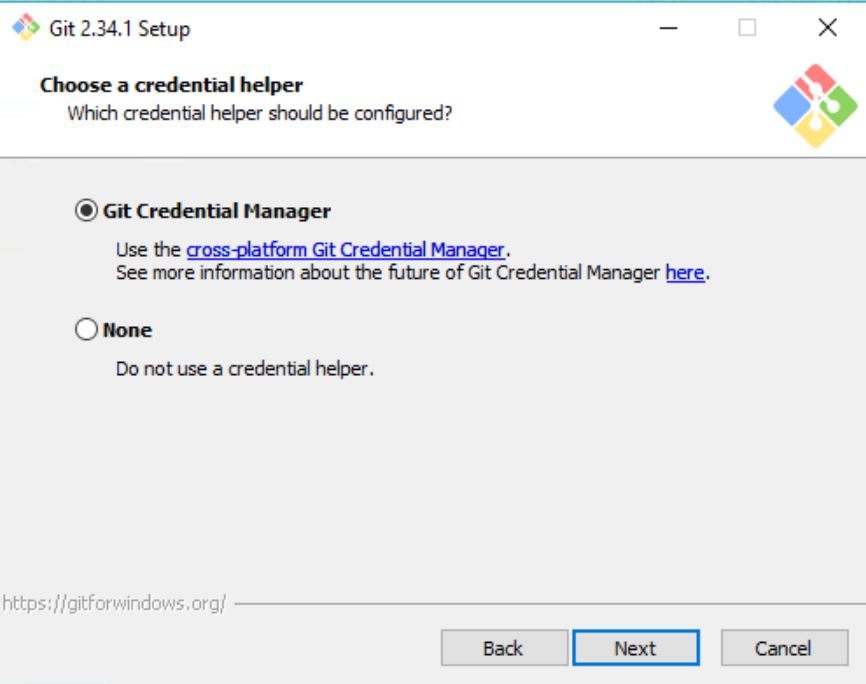
When you first push to a public GitHub repository, or clone a private GitHub repository, you will be prompted by the below window. Choose to login via “Token”, and enter your PAT.
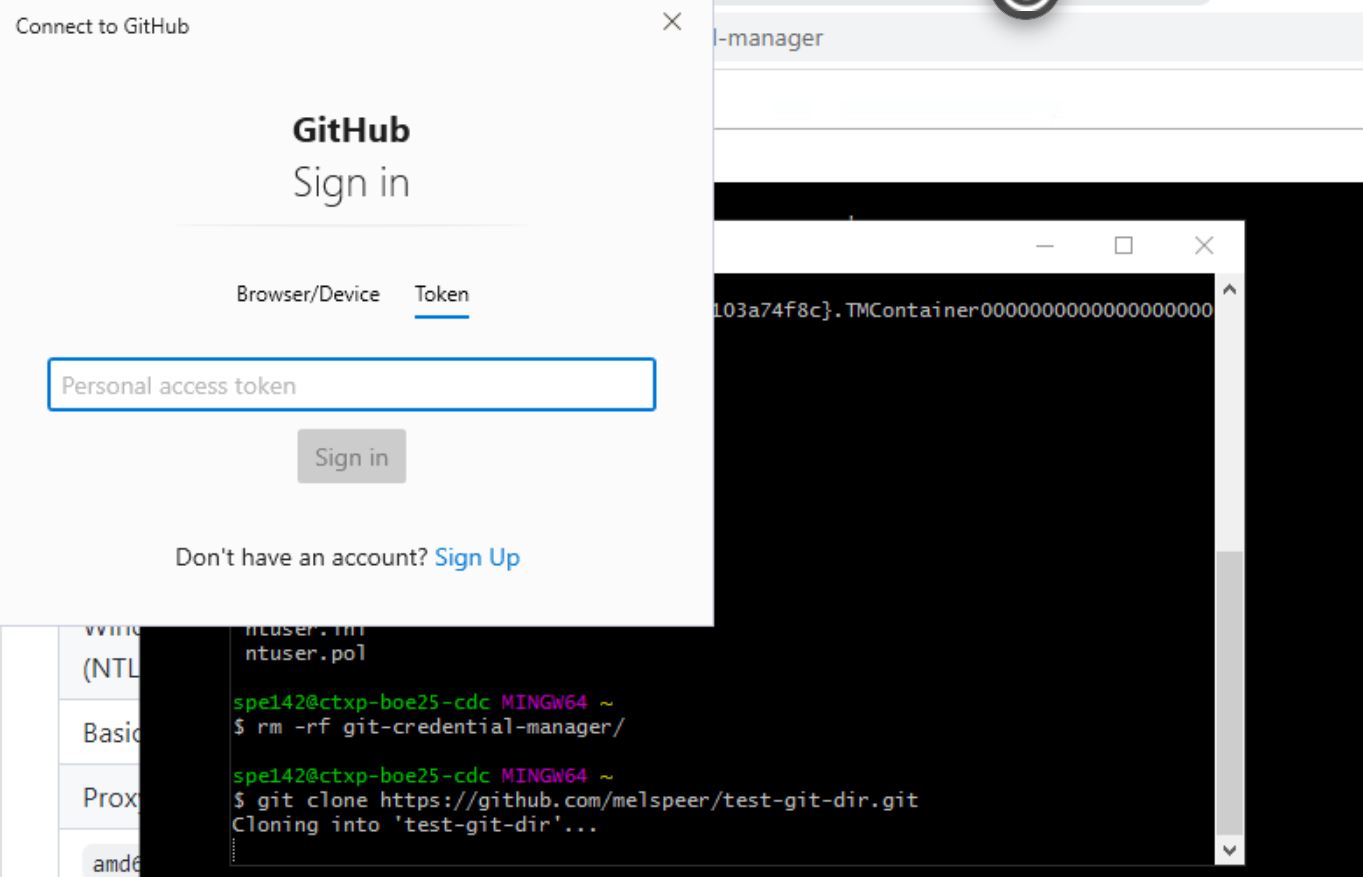
The GCM via GitBash automatically stores the entered PAT. In future cloning, pushing, or pulling the PAT will be automatically retrieved using the GCM.
Here you can find additional Instructions for GCM from the official GitHub Repository.
Linux (Ubuntu) users are recommended to use the GitHub Command Line Interface (GitHub CLI).
BASH
curl -fsSL https://cli.github.com/packages/githubcli-archive-keyring.gpg | sudo dd of=/usr/share/keyrings/githubcli-archive-keyring.gpg

echo "deb [arch=$(dpkg --print-architecture) signed-by=/usr/share/keyrings/githubcli-archive-keyring.gpg] https://cli.github.com/packages stable main" | sudo tee /etc/apt/sources.list.d/github-cli.list > /dev/null

sudo apt update

sudo apt install gh
Enter ‘gh auth login’ and follow the prompts. When prompted for your preferred protocol for Git operations, select HTTPS and, when asked if you would like to authenticate to Git with your GitHub credentials, enter Y.
Alternatively you can use GitHub CLI or Git Credential Manager (GCM) to remember your credentials.
4. Push local changes to a remote
Now that authentication is setup, we can return to the remote. This command will push the changes from our local repository to the repository on GitHub:
BASH
git push origin mainOUTPUT
Enumerating objects: 16, done.
Counting objects: 100% (16/16), done.
Delta compression using up to 8 threads.
Compressing objects: 100% (11/11), done.
Writing objects: 100% (16/16), 1.45 KiB | 372.00 KiB/s, done.
Total 16 (delta 2), reused 0 (delta 0)
remote: Resolving deltas: 100% (2/2), done.
To https://github.com/vlad/planets.git
 * [new branch]      main -> main
Branch error
If you get the following error it means your branch was not correctly set the branch to main during the third lesson.
ERROR
error: src refspec main does not match any
error: failed to push some refs to 'https://github.com/vlad/planets.git'To fix this first we need to change to the main branch this you will will need to change
BASH
git checkout -b mainOUTPUT
Switched to a new branch 'main'Then try to push again and it should work
BASH
git push origin mainOur local and remote repositories are now in this state:

The ‘-u’ Flag
You may see a -u option used with git push in some documentation. This option is synonymous with the --set-upstream-to option for the git branch command, and is used to associate the current branch with a remote branch so that the git pull command can be used without any arguments. To do this, simply use git push -u origin main once the remote has been set up.
We can pull changes from the remote repository to the local one as well:
BASH
git pull origin mainOUTPUT
From https://github.com/vlad/planets
 * branch            main     -> FETCH_HEAD
Already up-to-date.
Pulling has no effect in this case because the two repositories are already synchronized. If someone else had pushed some changes to the repository on GitHub, though, this command would download them to our local repository.
GitHub GUI
Browse to your planets repository on GitHub. Under the Code tab, find and click on the text that says “XX commits” (where “XX” is some number). Hover over, and click on, the three buttons to the right of each commit. What information can you gather/explore from these buttons? How would you get that same information in the shell?
The left-most button (with the picture of a clipboard) copies the full identifier of the commit to the clipboard. In the shell, git log will show you the full commit identifier for each commit.
When you click on the middle button, you’ll see all of the changes that were made in that particular commit. Green shaded lines indicate additions and red ones removals. In the shell we can do the same thing with git diff. In particular, git diff ID1..ID2 where ID1 and ID2 are commit identifiers (e.g. git diff a3bf1e5..041e637) will show the differences between those two commits.
The right-most button lets you view all of the files in the repository at the time of that commit. To do this in the shell, we’d need to checkout the repository at that particular time. We can do this with git checkout ID where ID is the identifier of the commit we want to look at. If we do this, we need to remember to put the repository back to the right state afterwards!
Uploading files directly in GitHub browser
Github also allows you to skip the command line and upload files directly to your repository without having to leave the browser. There are two options. First you can click the “Upload files” button in the toolbar at the top of the file tree. Or, you can drag and drop files from your desktop onto the file tree. You can read more about this on this GitHub page
GitHub Timestamp
Create a remote repository on GitHub. Push the contents of your local repository to the remote. Make changes to your local repository and push these changes. Go to the repo you just created on GitHub and check the timestamps of the files. How does GitHub record times, and why?
GitHub displays timestamps in a human readable relative format (i.e. “22 hours ago” or “three weeks ago”). However, if you hover over the timestamp, you can see the exact time at which the last change to the file occurred.
When we push changes, we’re interacting with a remote repository to update it with the changes we’ve made locally (often this corresponds to sharing the changes we’ve made with others). Commit only updates your local repository.
GitHub License and README files
In this episode we learned about creating a remote repository on GitHub, but when you initialized your GitHub repo, you didn’t add a README.md or a license file. If you had, what do you think would have happened when you tried to link your local and remote repositories?
In this case, we’d see a merge conflict due to unrelated histories. When GitHub creates a README.md file, it performs a commit in the remote repository. When you try to pull the remote repository to your local repository, Git detects that they have histories that do not share a common origin and refuses to merge.
BASH
git pull origin mainOUTPUT
warning: no common commits
remote: Enumerating objects: 3, done.
remote: Counting objects: 100% (3/3), done.
remote: Total 3 (delta 0), reused 0 (delta 0), pack-reused 0
Unpacking objects: 100% (3/3), done.
From https://github.com/vlad/planets
 * branch            main     -> FETCH_HEAD
 * [new branch]      main     -> origin/main
fatal: refusing to merge unrelated histories
You can force git to merge the two repositories with the option --allow-unrelated-histories. Be careful when you use this option and carefully examine the contents of local and remote repositories before merging.
BASH
git pull --allow-unrelated-histories origin mainOUTPUT
From https://github.com/vlad/planets
 * branch            main     -> FETCH_HEAD
Merge made by the 'recursive' strategy.
README.md | 1 +
1 file changed, 1 insertion(+)
create mode 100644 README.md
🖌 Collaborators!
You can add collaborators to repositories allowing them to contribute (i.e. push/pull).
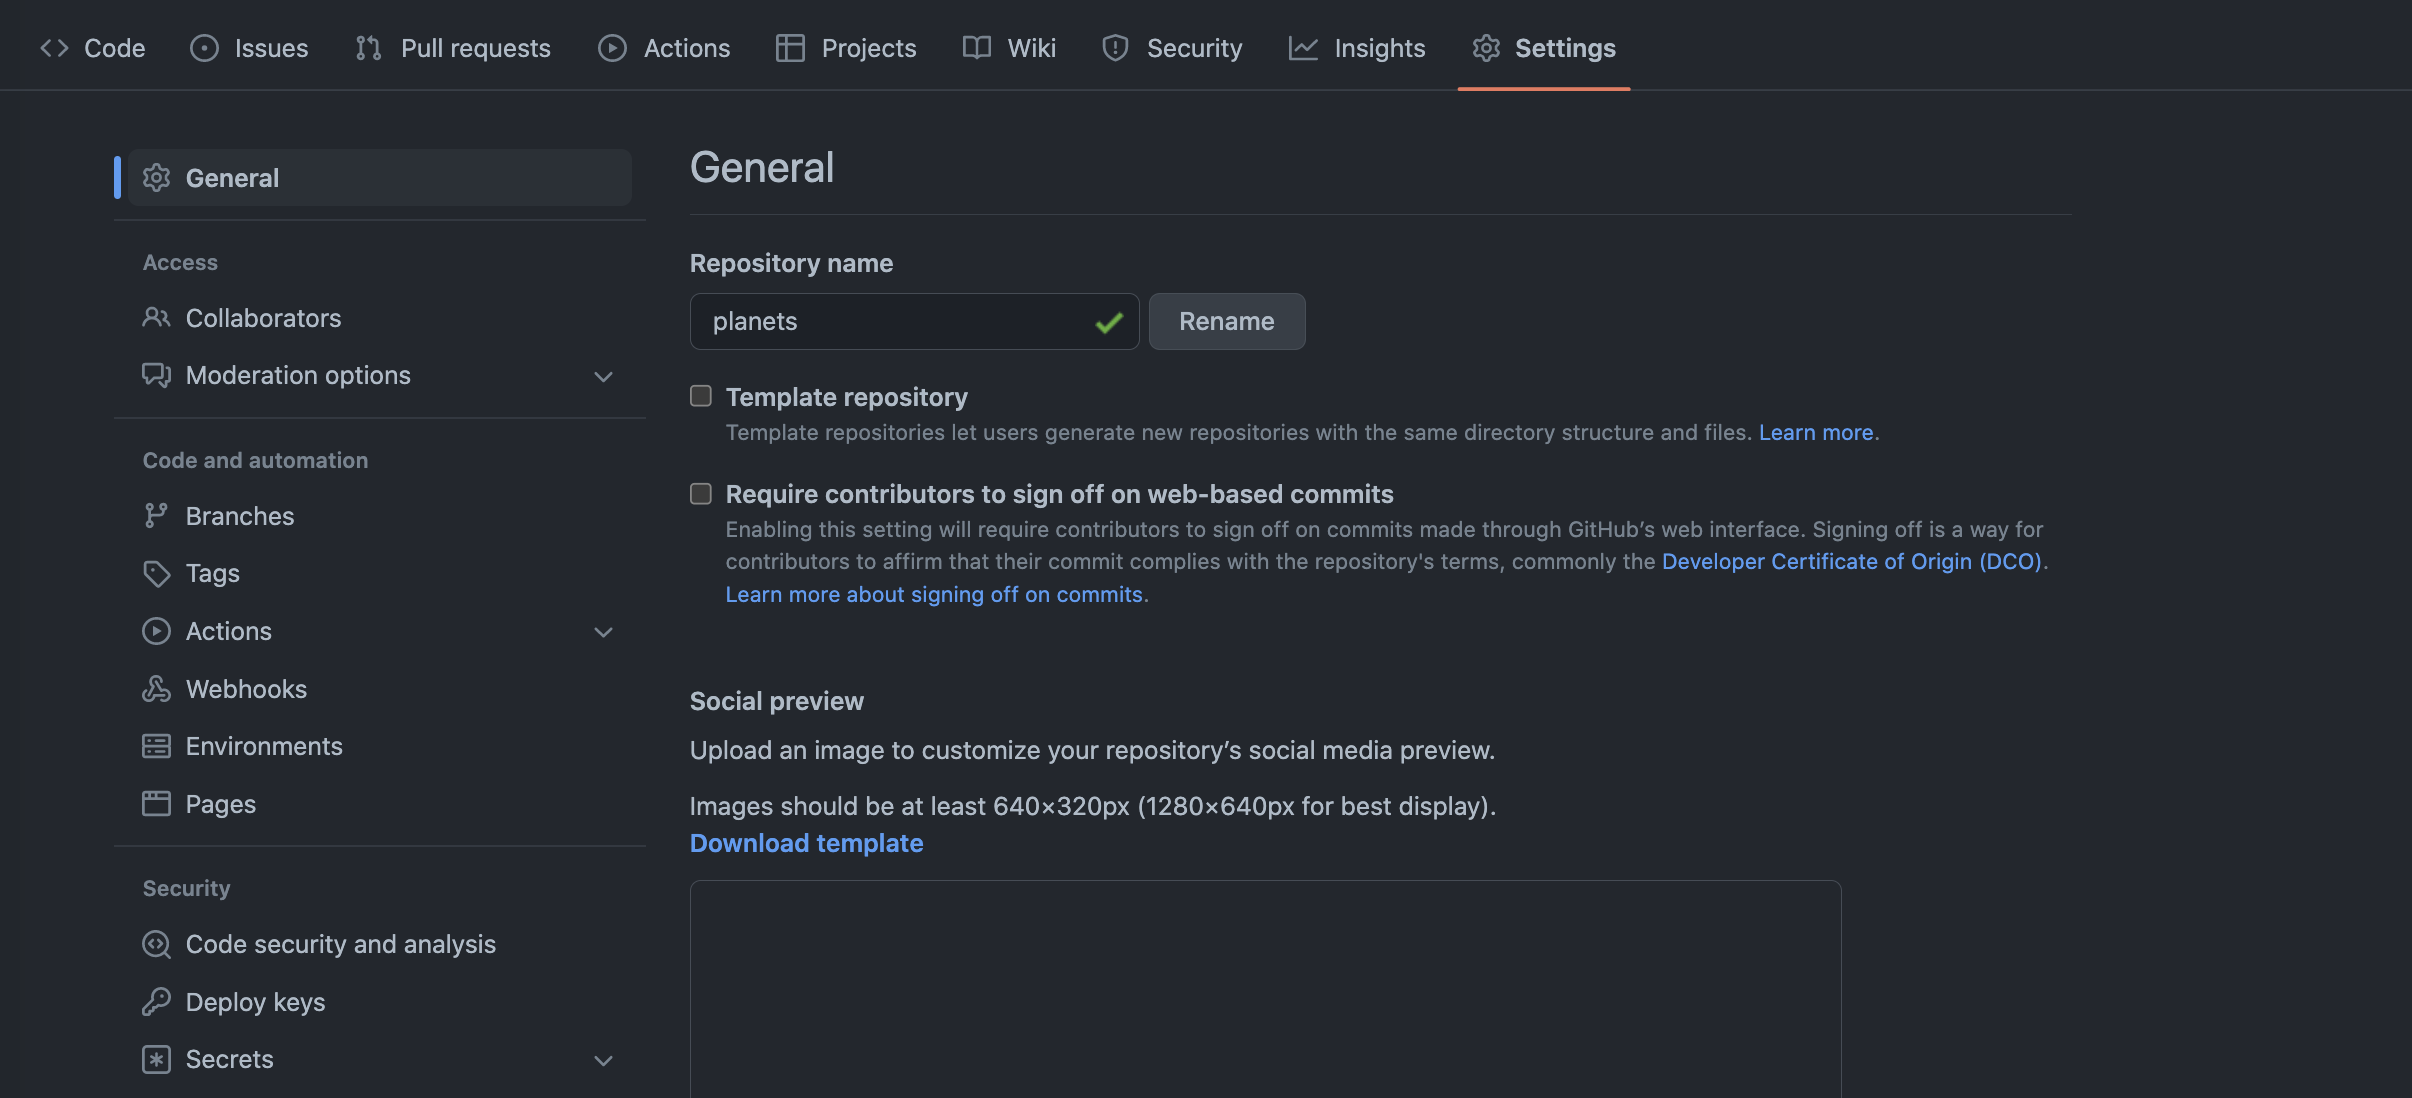
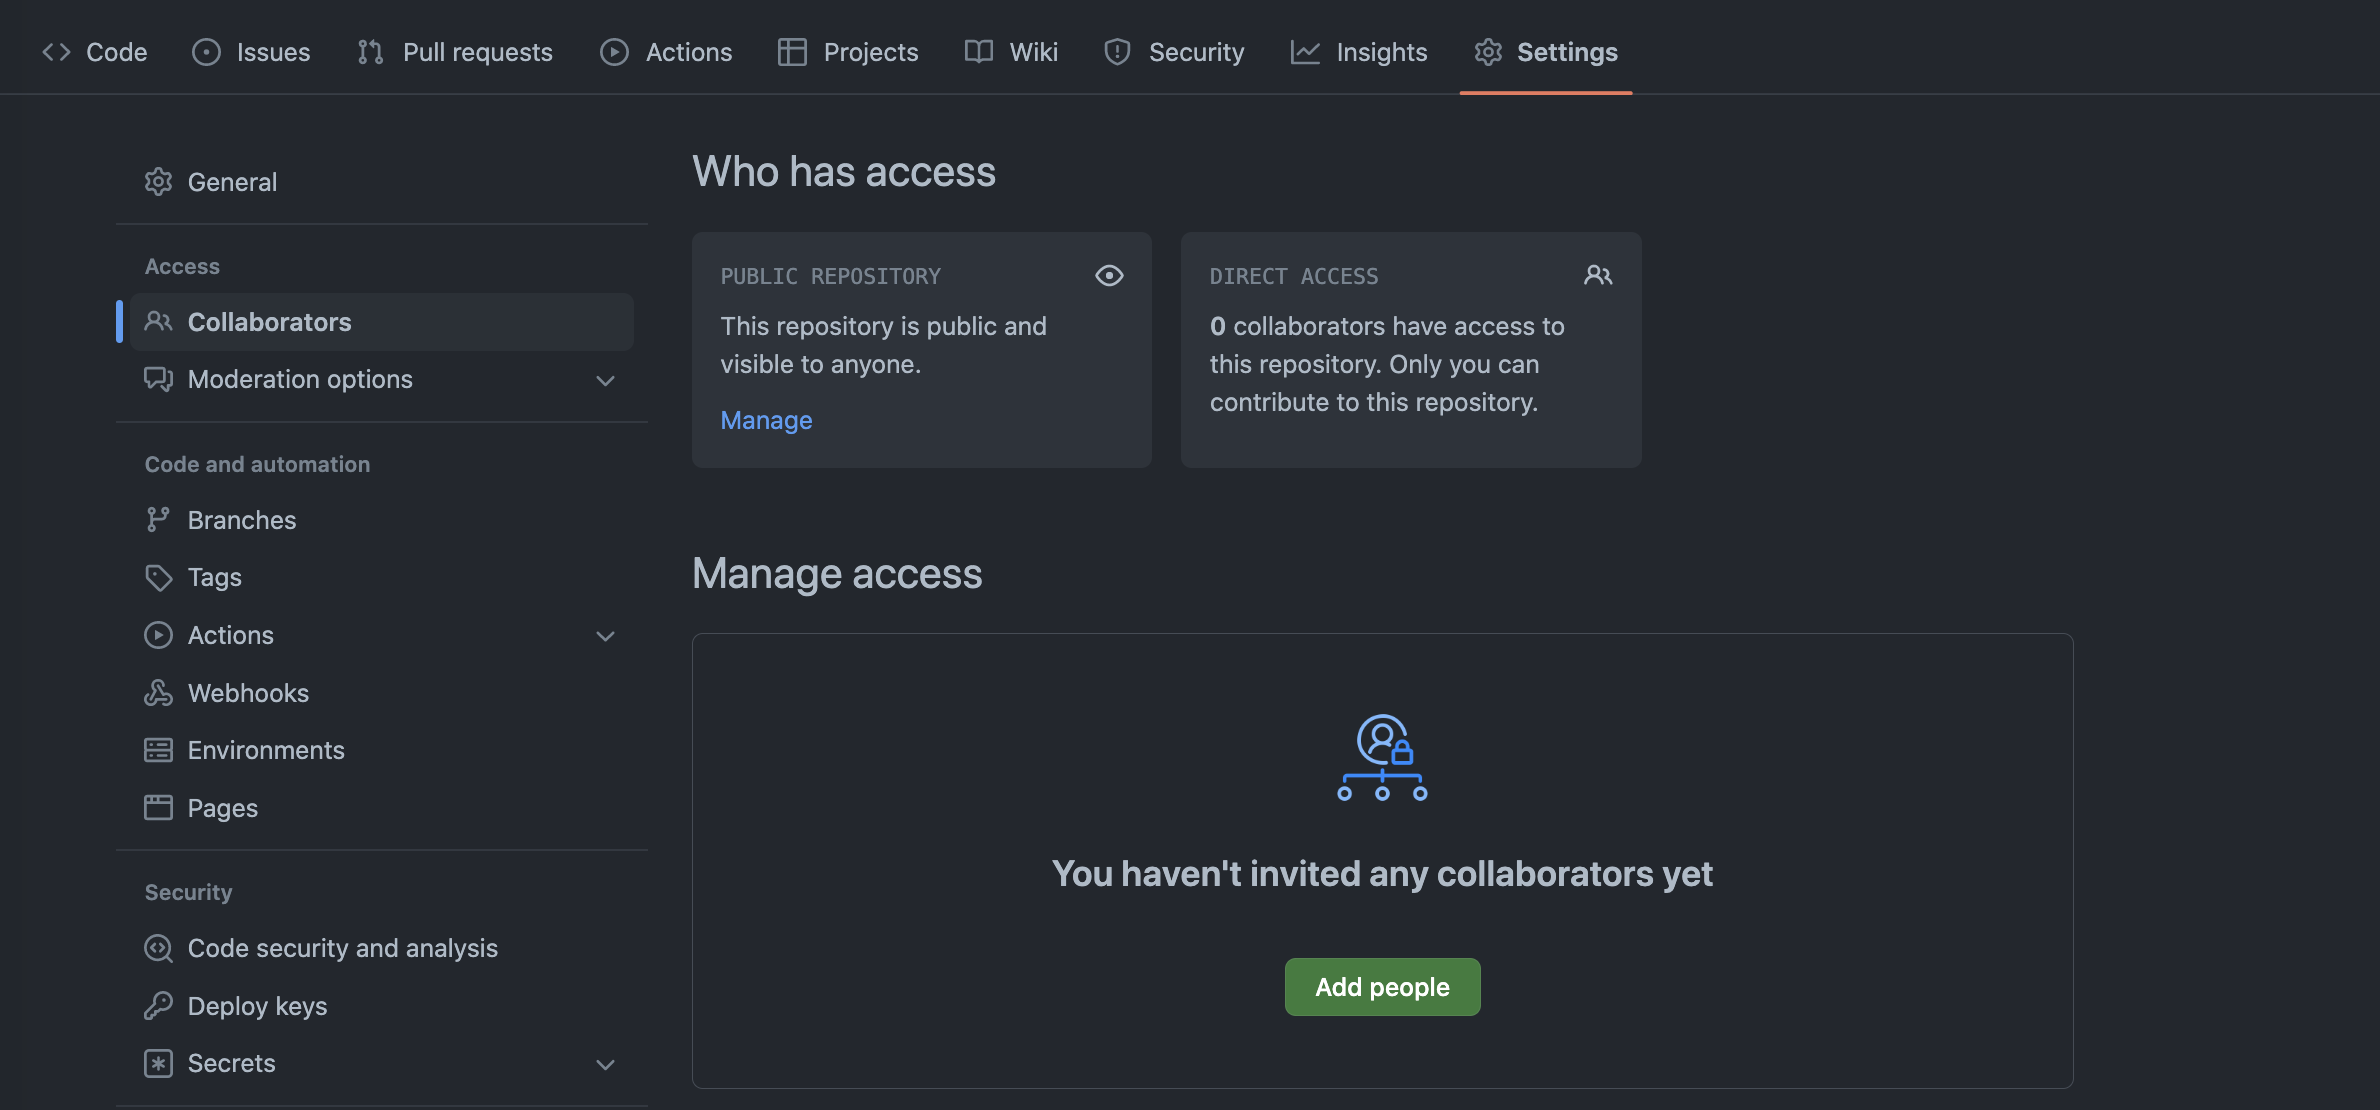
To do this navigate to your planets repository and click on the “Settings” tab on the far right hand side. Select “Collaborators” (under the ‘Access’ heading).
You can now add collaborators to the repository by searching their username or email address.
While we won’t have time to explore this in detail during this workshop you find more on collaborating here.
Key Points
- A local Git repository can be connected to one or more remote repositories.
- Authentication to GitHub via the command line can be via HTTPS and SSH - here we used Personal Access Token (PAT)
-
git pushcopies changes from a local repository to a remote repository. -
git pullcopies changes from a remote repository to a local repository.