Content from Git Basics
Last updated on 2024-03-12 | Edit this page
Overview
Questions
- What is version control and why should I use it?
Objectives
- Understand the benefits of an automated version control system.
- Understand the basics of how automated version control systems work.
We’ll start by exploring how version control can be used to keep track of what one person did and when. Even if you aren’t collaborating with other people, automated version control is much better than this situation:
We’ve all been in this situation before: it seems unnecessary to have multiple nearly-identical versions of the same document. Some word processors let us deal with this a little better, such as Microsoft Word’s Track Changes, Google Docs’ version history, or LibreOffice’s Recording and Displaying Changes.
Version control systems start with a base version of the document and then record changes you make each step of the way. You can think of it as a recording of your progress: you can rewind to start at the base document and play back each change you made, eventually arriving at your more recent version.

Once you think of changes as separate from the document itself, you can then think about “playing back” different sets of changes on the base document, ultimately resulting in different versions of that document. For example, two users can make independent sets of changes on the same document.

Unless multiple users make changes to the same section of the document - a conflict - you can incorporate two sets of changes into the same base document.

A version control system is a tool that keeps track of these changes for us, effectively creating different versions of our files. It allows us to decide which changes will be made to the next version (each record of these changes is called a commit, and keeps useful metadata about them. The complete history of commits for a particular project and their metadata make up a repository. Repositories can be kept in sync across different computers, facilitating collaboration among different people.
The Long History of Version Control Systems
Automated version control systems are nothing new. Tools like RCS, CVS, or Subversion have been around since the early 1980s and are used by many large companies. However, many of these are now considered legacy systems (i.e., outdated) due to various limitations in their capabilities. More modern systems, such as Git and Mercurial, are distributed, meaning that they do not need a centralized server to host the repository. These modern systems also include powerful merging tools that make it possible for multiple authors to work on the same files concurrently.
Paper Writing
- Imagine you drafted an excellent paragraph for a paper you are writing, but later ruin it. How would you retrieve the excellent version of your conclusion? Is it even possible?
- Imagine you have 5 co-authors. How would you manage the changes and comments they make to your paper? If you use LibreOffice Writer or Microsoft Word, what happens if you accept changes made using the
Track Changesoption? Do you have a history of those changes?
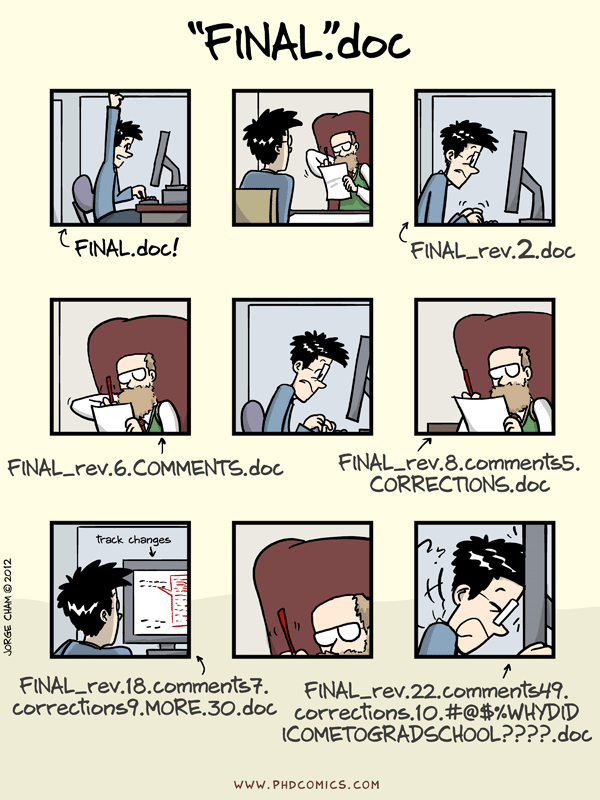
- Recovering the excellent version is only possible if you created a copy of the old version of the paper. The danger of losing good versions often leads to the problematic workflow illustrated in the PhD Comics cartoon at the top of this page.
- Collaborative writing with traditional word processors is cumbersome. Either every collaborator has to work on a document sequentially (slowing down the process of writing), or you have to send out a version to all collaborators and manually merge their comments into your document. The ‘track changes’ or ‘record changes’ option can highlight changes for you and simplifies merging, but as soon as you accept changes you will lose their history. You will then no longer know who suggested that change, why it was suggested, or when it was merged into the rest of the document. Even online word processors like Google Docs or Microsoft Office Online do not fully resolve these problems.
Content from Setting Up Git
Last updated on 2024-03-12 | Edit this page
Overview
Questions
- How do I get set up to use Git?
- How do I configure my local machine with git?
Objectives
- Create a GitHub account
- Configure
gitthe first time it is used on a computer. - Understand the meaning of the
--global configurationflag.
GitHub signup
Create account
If you have not already create a github account at https://github.com/signup
Local configuration
🔗 Offical GitHub documentation - setting your username
When we use Git on a new computer for the first time, we need to configure a few things. Below are a few examples of configurations we will set as we get started with Git:
- our name and email address,
- what our preferred text editor is,
- and that we want to use these settings globally (i.e. for every project).
On a command line, Git commands are written as git verb options, where verb is what we actually want to do and options is additional optional information which may be needed for the verb. So here is how Dracula sets up his new laptop:
Open terminal (MacOS) or Git Bash (WindowsOS) and configure your git workspace:
BASH
git config --global user.name "Vlad Dracula"
git config --global user.email "vlad@tran.sylvan.ia"
Please use your own name and email address instead of Dracula’s. This user name and email will be associated with your subsequent Git activity, which means that any changes pushed to GitHub, BitBucket, GitLab or another Git host server after this lesson will include this information.
For this lesson, we will be interacting with GitHub and so the email address used should be the same as the one used when setting up your GitHub account. If you are concerned about privacy, please review GitHub’s instructions for keeping your email address private.
Line Endings
As with other keys, when you hit Enter or ↵ (WindowsOS) or Return (MacOS) on your keyboard, your computer encodes this input as a character. Different operating systems use different character(s) to represent the end of a line - you may also hear these referred to as newlines or line breaks. Because Git uses these characters to compare files, it may cause unexpected issues when editing a file on different machines. Though it is beyond the scope of this lesson, you can read more about this issue in the Pro Git book.
You can change the way Git recognizes and encodes line endings using the core.autocrlf command to git config. The following settings are recommended:
BASH
git config --global core.autocrlf trueBASH
git config --global core.autocrlf inputIf you want to change the default editor after today’s session, the table below will help.
| Editor | Configuration command |
|---|---|
| Atom | git config --global core.editor "atom --wait" |
| nano | git config --global core.editor "nano -w" |
| BBEdit (Mac, with command line tools) | git config --global core.editor "bbedit -w" |
| Sublime Text (Mac) | git config --global core.editor "/Applications/Sublime\ Text.app/Contents/SharedSupport/bin/subl -n -w" |
| Sublime Text (Win, 32-bit install) | git config --global core.editor "'c:/program files (x86)/sublime text 3/sublime_text.exe' -w" |
| Sublime Text (Win, 64-bit install) | git config --global core.editor "'c:/program files/sublime text 3/sublime_text.exe' -w" |
| Notepad (Win) | git config --global core.editor "c:/Windows/System32/notepad.exe" |
| Notepad++ (Win, 32-bit install) | git config --global core.editor "'c:/program files (x86)/Notepad++/notepad++.exe' -multiInst -notabbar -nosession -noPlugin" |
| Notepad++ (Win, 64-bit install) | git config --global core.editor "'c:/program files/Notepad++/notepad++.exe' -multiInst -notabbar -nosession -noPlugin" |
| Kate (Linux) | git config --global core.editor "kate" |
| Gedit (Linux) | git config --global core.editor "gedit --wait --new-window" |
| Scratch (Linux) | git config --global core.editor "scratch-text-editor" |
| Emacs | git config --global core.editor "emacs" |
| Vim | git config --global core.editor "vim" |
| VS Code | git config --global core.editor "code --wait" |
It is possible to reconfigure the text editor for Git whenever you want to change it.
Exiting text editors
Note that Vim is the default editor for many programs. If you haven’t used Vim before and wish to exit a session without saving your changes, press Esc then type :q! and hit Return. If you want to save your changes and quit, press Esc then type :wq and hit Return.
In this lesson we instruct you to use nano. To exit nano editor press Control + X, it will prompt you to save changes press Y and Return.
Default branch
Git (2.28+) allows configuration of the name of the branch created when you initialize any new repository. Dracula decides to use that feature to set it to main so it matches the cloud service he will eventually use.
BASH
git config --global init.defaultBranch mainCallout
Source file changes are associated with a “branch.” For new learners in this lesson, it’s enough to know that branches exist, and this lesson uses one branch. By default, Git will create a branch called master when you create a new repository with git init (as explained in the next Episode). This term evokes the racist practice of human slavery and the software development community has moved to adopt more inclusive language.
In 2020, most Git code hosting services transitioned to using main as the default branch. As an example, any new repository that is opened in GitHub and GitLab default to main. However, Git has not yet made the same change. As a result, local repositories must be manually configured have the same main branch name as most cloud services.
For versions of Git prior to 2.28, the change can be made on an individual repository level. The command for this is in the next episode. Note that if this value is unset in your local Git configuration, the init.defaultBranch value defaults to master.
The five commands we just ran above only need to be run once: the flag --global tells Git to use the settings for every project, in your user account, on this computer.
You can check your settings at any time:
BASH
$ git config --listYou can change your configuration as many times as you want: use the same commands to choose another editor or update your email address.
Git Help and Manual
Always remember that if you forget the subcommands or options of a git command, you can access the relevant list of options typing git <command> -h or access the corresponding Git manual by typing git <command> --help, e.g.:
BASH
git config -h
git config --help
While viewing the manual, remember the : is a prompt waiting for commands and you can press Q to exit the manual.
More generally, you can get the list of available git commands and further resources of the Git manual typing:
BASH
git helpKey Points
- Git and GitHub are not the same thing. Git is an open source version control tool, GitHub is a company that hosts Git repositories in the web and provides a web interface to interact with repos they host.
- Use
git configwith the--globaloption to configure a user name, email address, editor, and other preferences once per machine. - Get help with
git help
Content from Creating a Repository
Last updated on 2024-03-12 | Edit this page
Overview
Questions
- Where does Git store information?
Objectives
- Create a local Git repository.
- Describe the purpose of the
.gitdirectory.
We will continue with the story of Wolfman and Dracula who are investigating if it is possible to send a planetary lander to Mars.
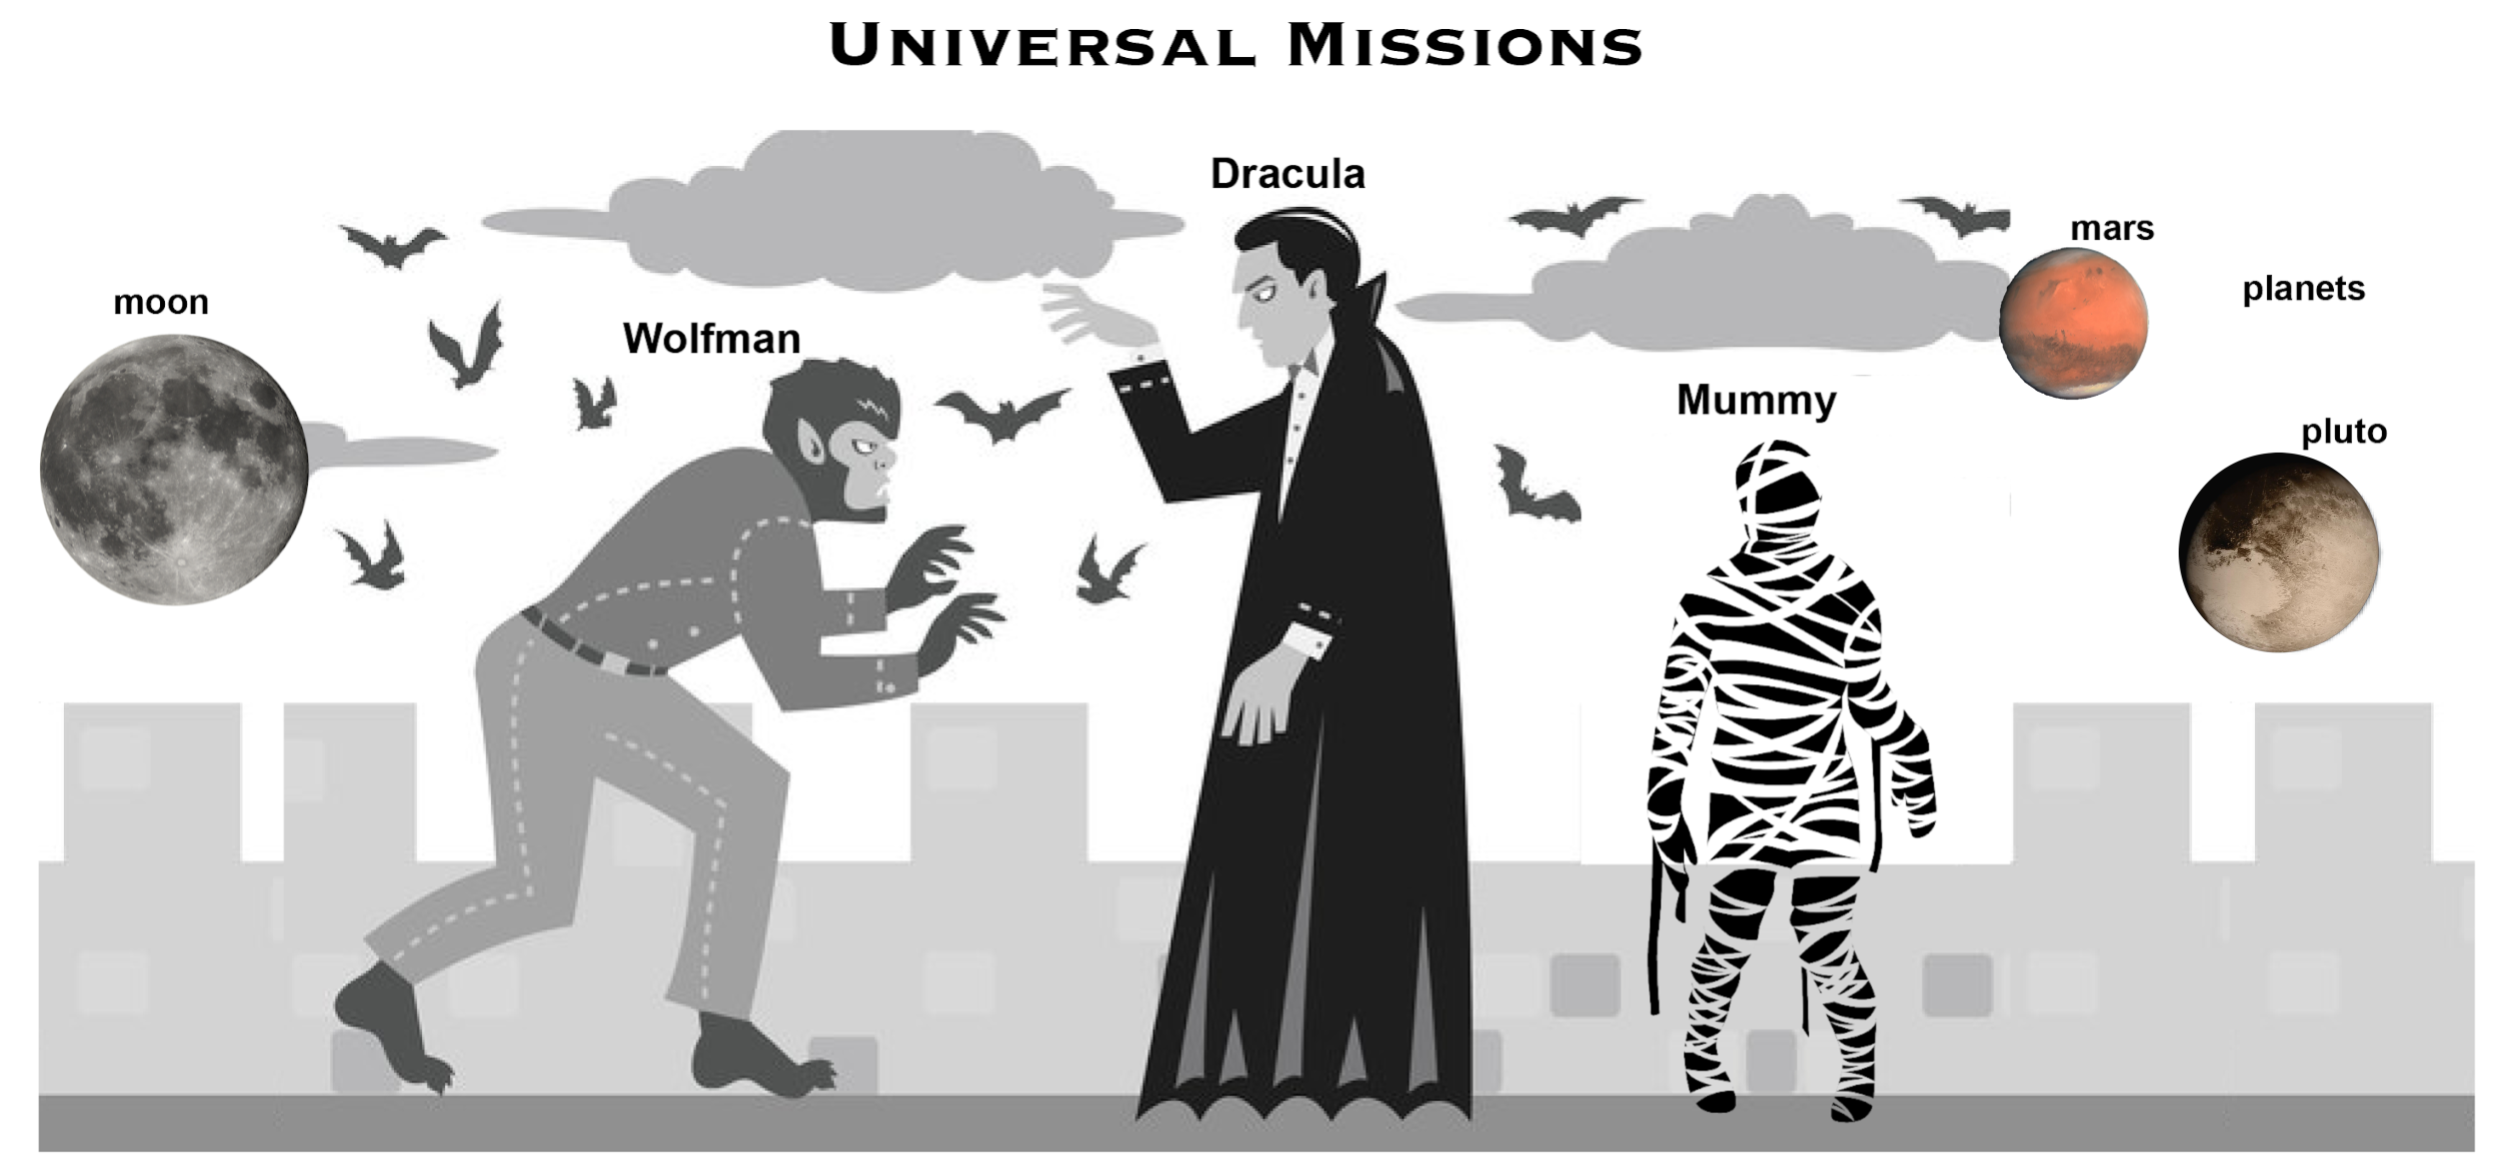 Werewolf vs dracula by b-maze / Deviant Art. Mars by European Space Agency / CC-BY-SA 3.0 IGO. Pluto / Courtesy NASA/JPL-Caltech. Mummy © Gilad Fried / The Noun Project / CC BY 3.0. Moon © Luc Viatour / https://lucnix.be / CC BY-SA 3.0.
New directory
First, let’s create a new directory in the Desktop folder for our work and then change the current working directory to the newly created one:
BASH
cd ~/Desktop
mkdir planets
cd planets
git init
Then we tell Git to make planets a repository – a place where Git can store versions of our files:
BASH
git initIt is important to note that git init will create a repository that can include subdirectories and their files—there is no need to create separate repositories nested within the planets repository, whether subdirectories are present from the beginning or added later. Also, note that the creation of the planets directory and its initialization as a repository are completely separate processes.
If we use ls to show the directory’s contents, it appears that nothing has changed:
BASH
lsBut if we add the -a flag to show everything, we can see that Git has created a hidden directory within planets called .git:
BASH
ls -aOUTPUT
. .. .gitGit uses this special subdirectory to store all the information about the project, including the tracked files and sub-directories located within the project’s directory. If we ever delete the .git subdirectory, we will lose the project’s history.
Default branch
Next, we will change the default branch to be called main. This might be the default branch depending on your settings and version of git. See the setup episode for more information on this change.
BASH
git checkout -b mainOUTPUT
Switched to a new branch 'main'We can check that everything is set up correctly by asking Git to tell us the status of our project:
BASH
git statusOUTPUT
On branch main

No commits yet

nothing to commit (create/copy files and use "git add" to track)
If you are using a different version of git, the exact wording of the output might be slightly different.
Places to Create Git Repositories
Along with tracking information about planets (the project we have already created), Dracula would also like to track information about moons. Despite Wolfman’s concerns, Dracula creates a moons project inside his planets project with the following sequence of commands:
BASH
cd ~/Desktop   # return to Desktop directory
cd planets     # go into planets directory, which is already a Git repository
ls -a          # ensure the .git subdirectory is still present in the planets directory
mkdir moons    # make a subdirectory planets/moons
cd moons       # go into moons subdirectory
git init       # make the moons subdirectory a Git repository
ls -a          # ensure the .git subdirectory is present indicating we have created a new Git repository
Is the git init command, run inside the moons subdirectory, required for tracking files stored in the moons subdirectory?
No. Dracula does not need to make the moons subdirectory a Git repository because the planets repository can track any files, sub-directories, and subdirectory files under the planets directory. Thus, in order to track all information about moons, Dracula only needed to add the moons subdirectory to the planets directory.
Additionally, Git repositories can interfere with each other if they are “nested”: the outer repository will try to version-control the inner repository. Therefore, it’s best to create each new Git repository in a separate directory. To be sure that there is no conflicting repository in the directory, check the output of git status. If it looks like the following, you are good to go to create a new repository as shown above:
BASH
git statusOUTPUT
fatal: Not a git repository (or any of the parent directories): .gitBackground
Removing files from a Git repository needs to be done with caution. But we have not learned yet how to tell Git to track a particular file; we will learn this in the next episode. Files that are not tracked by Git can easily be removed like any other “ordinary” files with
BASH
rm filenameSimilarly a directory can be removed using rm -r dirname or rm -rf dirname. If the files or folder being removed in this fashion are tracked by Git, then their removal becomes another change that we will need to track, as we will see in the next episode.
Solution
Git keeps all of its files in the .git directory. To recover from this little mistake, Dracula can just remove the .git folder in the moons subdirectory by running the following command from inside the planets directory:
BASH
rm -rf moons/.gitBut be careful! Running this command in the wrong directory will remove the entire Git history of a project you might want to keep. Therefore, always check your current directory using the command pwd.
Content from Tracking Changes
Last updated on 2024-03-12 | Edit this page
Overview
Questions
- How do I record changes in Git?
- How do I check the status of my version control repository?
- How do I record notes about what changes I made and why?
Objectives
- Go through the modify-add-commit cycle for one or more files.
- Explain where information is stored at each stage of that cycle.
- Distinguish between descriptive and non-descriptive commit messages.
First let’s make sure we’re still in the right directory. You should be in the planets directory.
BASH
cd ~/Desktop/planetsCreate and edit a new file
Let’s create a file called mars.txt that contains some notes about the Red Planet’s suitability as a base. We’ll use nano to edit the file; you can use whatever editor you like. In particular, this does not have to be the core.editor you set globally earlier. But remember, the bash command to create or edit a new file will depend on the editor you choose (it might not be nano). For a refresher on text editors, check out “Which Editor?” in The Unix Shell lesson.
BASH
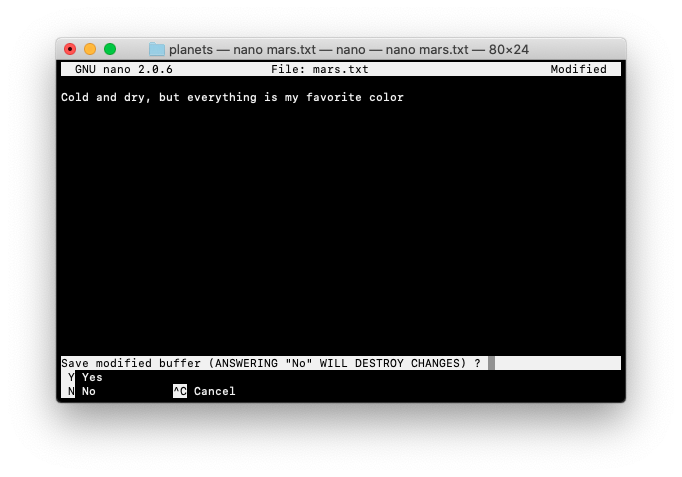
nano mars.txtType the text below into the mars.txt file:
OUTPUT
Cold and dry, but everything is my favorite color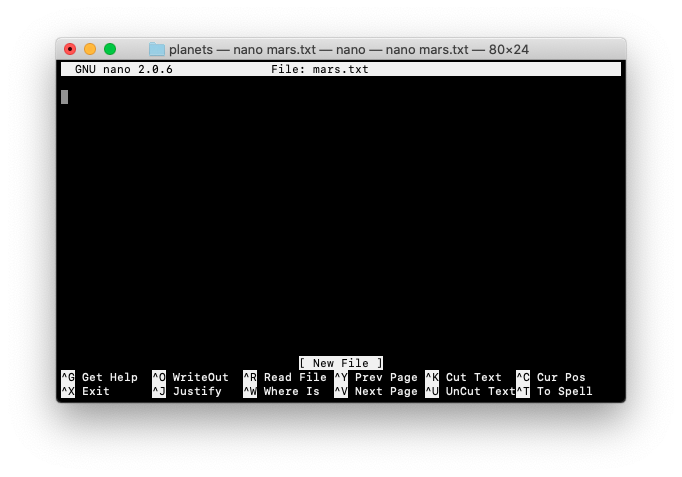

Let’s first verify that the file was properly created by running the list command (ls):
BASH
lsOUTPUT
mars.txtmars.txt contains a single line, which we can see by running:
BASH
cat mars.txtOUTPUT
Cold and dry, but everything is my favorite colorCheck status
If we check the status of our project again, Git tells us that it’s noticed the new file:
BASH
git statusOUTPUT
On branch main

No commits yet

Untracked files:
   (use "git add <file>..." to include in what will be committed)

	mars.txt

nothing added to commit but untracked files present (use "git add" to track)
The “untracked files” message means that there’s a file in the directory that Git isn’t keeping track of.
git add
We can tell Git to track a file using git add:
BASH
git add mars.txtand then check that the right thing happened:
BASH
git statusOUTPUT
On branch main

No commits yet

Changes to be committed:
  (use "git rm --cached <file>..." to unstage)

	new file:   mars.txt
git commit
Git now knows that it’s supposed to keep track of mars.txt, but it hasn’t recorded these changes as a commit yet. To get it to do that, we need to run one more command:
BASH
git commit -m "Start notes on Mars as a base"OUTPUT
[main (root-commit) f22b25e] Start notes on Mars as a base
 1 file changed, 1 insertion(+)
 create mode 100644 mars.txt
When we run git commit, Git takes everything we have told it to save by using git add and stores a copy permanently inside the special .git directory. This permanent copy is called a commit (or revision) and its short identifier is f22b25e. Your commit may have another identifier.
We use the -m flag (for “message”) to record a short, descriptive, and specific comment that will help us remember later on what we did and why. If we just run git commit without the -m option, Git will launch nano (or whatever other editor we configured as core.editor) so that we can write a longer message.
Good commit messages start with a brief (<50 characters) statement about the changes made in the commit. Generally, the message should complete the sentence “If applied, this commit will”
If we run git status now:
BASH
git statusOUTPUT
On branch main
nothing to commit, working directory clean
it tells us everything is up to date.
git log and git diff
If we want to know what we’ve done recently, we can ask Git to show us the project’s history using git log:
BASH
git logOUTPUT
commit f22b25e3233b4645dabd0d81e651fe074bd8e73b
Author: Vlad Dracula <vlad@tran.sylvan.ia>
Date:   Thu Aug 22 09:51:46 2013 -0400

    Start notes on Mars as a base
git log lists all commits made to a repository in reverse chronological order. The listing for each commit includes the commit’s full identifier (which starts with the same characters as the short identifier printed by the git commit command earlier), the commit’s author, when it was created, and the log message Git was given when the commit was created.
Where Are My Changes?
If we run ls at this point, we will still see just one file called mars.txt. That’s because Git saves information about files’ history in the special .git directory mentioned earlier so that our filesystem doesn’t become cluttered (and so that we can’t accidentally edit or delete an old version).
Now suppose Dracula adds more information to the file. (Again, we’ll edit with nano and then cat the file to show its contents; you may use a different editor, and don’t need to cat.)
We can see our new text in the mars.txt file
BASH
nano mars.txt
cat mars.txt
OUTPUT
Cold and dry, but everything is my favorite color
The two moons may be a problem for Wolfman
When we run git status now, it tells us that a file it already knows about has been modified:
BASH
git statusOUTPUT
On branch main
Changes not staged for commit:
  (use "git add <file>..." to update what will be committed)
  (use "git checkout -- <file>..." to discard changes in working directory)

	modified:   mars.txt

no changes added to commit (use "git add" and/or "git commit -a")
The last line is the key phrase: “no changes added to commit”. We have changed this file, but we haven’t told Git we will want to save those changes (which we do with git add) nor have we saved them (which we do with git commit). So let’s do that now. It is good practice to always review our changes before saving them. We do this using git diff. This shows us the differences between the current state of the file and the most recently saved version:
BASH
git diffOUTPUT
diff --git a/mars.txt b/mars.txt
index df0654a..315bf3a 100644
--- a/mars.txt
+++ b/mars.txt
@@ -1 +1,2 @@
 Cold and dry, but everything is my favorite color
+The two moons may be a problem for Wolfman
The output is cryptic because it is actually a series of commands for tools like editors and patch telling them how to reconstruct one file given the other. If we break it down into pieces:
- The first line tells us that Git is producing output similar to the Unix
diffcommand comparing the old and new versions of the file. - The second line tells exactly which versions of the file Git is comparing;
df0654aand315bf3aare unique computer-generated labels for those versions. - The third and fourth lines once again show the name of the file being changed.
- The remaining lines are the most interesting, they show us the actual differences and the lines on which they occur. In particular, the
+marker in the first column shows where we added a line.
After reviewing our change, it’s time to commit it:
BASH
git commit -m "Add concerns about effects of Mars' moons on Wolfman"OUTPUT
On branch main
Changes not staged for commit:
  (use "git add <file>..." to update what will be committed)
  (use "git checkout -- <file>..." to discard changes in working directory)

	modified:   mars.txt

no changes added to commit (use "git add" and/or "git commit -a")
Whoops: Git won’t commit because we didn’t use git add first. Let’s fix that:
BASH
git add mars.txt
git commit -m "Add concerns about effects of Mars' moons on Wolfman"
OUTPUT
[main 34961b1] Add concerns about effects of Mars' moons on Wolfman
 1 file changed, 1 insertion(+)
Git insists that we add files to the set we want to commit before actually committing anything. This allows us to commit our changes in stages and capture changes in logical portions rather than only large batches. For example, suppose we’re adding a few citations to relevant research to our thesis. We might want to commit those additions, and the corresponding bibliography entries, but not commit some of our work drafting the conclusion (which we haven’t finished yet).
To allow for this, Git has a special staging area where it keeps track of things that have been added to the current changeset but not yet committed.
Staging Area
If you think of Git as taking snapshots of changes over the life of a project, git add specifies what will go in a snapshot (putting things in the staging area), and git commit then actually takes the snapshot, and makes a permanent record of it (as a commit). If you don’t have anything staged when you type git commit, Git will prompt you to use git commit -a or git commit --all, which is kind of like gathering everyone to take a group photo! However, it’s almost always better to explicitly add things to the staging area, because you might commit changes you forgot you made. (Going back to the group photo simile, you might get an extra with incomplete makeup walking on the stage for the picture because you used -a!) Try to stage things manually, or you might find yourself searching for “git undo commit” more than you would like!

Let’s watch as our changes to a file move from our editor to the staging area and into long-term storage. First, we’ll add another line to the file:
BASH
nano mars.txt
cat mars.txt
OUTPUT
Cold and dry, but everything is my favorite color
The two moons may be a problem for Wolfman
But the Mummy will appreciate the lack of humidity
BASH
git diffOUTPUT
diff --git a/mars.txt b/mars.txt
index 315bf3a..b36abfd 100644
--- a/mars.txt
+++ b/mars.txt
@@ -1,2 +1,3 @@
 Cold and dry, but everything is my favorite color
 The two moons may be a problem for Wolfman
+But the Mummy will appreciate the lack of humidity
So far, so good: we’ve added one line to the end of the file (shown with a + in the first column). Now let’s put that change in the staging area and see what git diff reports:
BASH
git add mars.txt
git diff
There is no output: as far as Git can tell, there’s no difference between what it’s been asked to save permanently and what’s currently in the directory. However, if we do this:
BASH
git diff --stagedOUTPUT
diff --git a/mars.txt b/mars.txt
index 315bf3a..b36abfd 100644
--- a/mars.txt
+++ b/mars.txt
@@ -1,2 +1,3 @@
 Cold and dry, but everything is my favorite color
 The two moons may be a problem for Wolfman
+But the Mummy will appreciate the lack of humidity
it shows us the difference between the last committed change and what’s in the staging area. Let’s save our changes:
git commit -m "Discuss concerns about Mars' climate for Mummy"OUTPUT
[main 005937f] Discuss concerns about Mars' climate for Mummy
 1 file changed, 1 insertion(+)
check our status:
git statusOUTPUT
On branch main
nothing to commit, working directory clean
and look at the history of what we’ve done so far:
git logOUTPUT
commit 005937fbe2a98fb83f0ade869025dc2636b4dad5 (HEAD -> main)
Author: Vlad Dracula <vlad@tran.sylvan.ia>
Date:   Thu Aug 22 10:14:07 2013 -0400

    Discuss concerns about Mars' climate for Mummy

commit 34961b159c27df3b475cfe4415d94a6d1fcd064d
Author: Vlad Dracula <vlad@tran.sylvan.ia>
Date:   Thu Aug 22 10:07:21 2013 -0400

    Add concerns about effects of Mars' moons on Wolfman

commit f22b25e3233b4645dabd0d81e651fe074bd8e73b
Author: Vlad Dracula <vlad@tran.sylvan.ia>
Date:   Thu Aug 22 09:51:46 2013 -0400

Start notes on Mars as a basePaging the Log
When the output of git log is too long to fit in your screen, git uses a program to split it into pages of the size of your screen. When this “pager” is called, you will notice that the last line in your screen is a :, instead of your usual prompt.
- To get out of the pager, press Q.
- To move to the next page, press Spacebar.
- To search for
some_wordin all pages, press / and typesome_word. Navigate through matches pressing N.
Limit Log Size
To avoid having git log cover your entire terminal screen, you can limit the number of commits that Git lists by using -N, where N is the number of commits that you want to view. For example, if you only want information from the last commit you can use:
BASH
git log -1OUTPUT
commit 005937fbe2a98fb83f0ade869025dc2636b4dad5 (HEAD -main)
Author: Vlad Dracula <vlad@tran.sylvan.ia>
Date:   Thu Aug 22 10:14:07 2013 -0400

  Discuss concerns about Mars' climate for Mummy
You can also reduce the quantity of information using the --oneline option:
BASH
git log --onelineOUTPUT
005937f (HEAD -> main) Discuss concerns about Mars' climate for Mummy
34961b1 Add concerns about effects of Mars' moons on Wolfman
f22b25e Start notes on Mars as a base
You can also combine the --oneline option with others. One useful combination adds --graph to display the commit history as a text-based graph and to indicate which commits are associated with the current HEAD, the current branch main, or other Git references:
BASH
git log --oneline --graphOUTPUT
* 005937f (HEAD -> main) Discuss concerns about Mars' climate for Mummy
* 34961b1 Add concerns about effects of Mars' moons on Wolfman
* f22b25e Start notes on Mars as a base
Exercises
Directories
Two important facts you should know about directories in Git.
1. Git does not track directories on their own, only files within them.
Try it for yourself:
BASH
mkdir spaceships
git status
git add spaceships
git status
Note, our newly created empty directory spaceships does not appear in the list of untracked files even if we explicitly add it (via git add) to our repository. This is the reason why you will sometimes see .gitkeep files in otherwise empty directories. Unlike .gitignore, these files are not special and their sole purpose is to populate a directory so that Git adds it to the repository. In fact, you can name such files anything you like.
2. If you create a directory in your Git repository and populate it with files, you can add all files in the directory at once by
BASH
git add <directory-with-files>Try it for yourself:
BASH
touch spaceships/apollo-11 spaceships/sputnik-1
git status
git add spaceships
git status
Before moving on, we will commit these changes.
BASH
git commit -m "Add some initial thoughts on spaceships"To recap, when we want to add changes to our repository, we first need to add the changed files to the staging area (git add) and then commit the staged changes to the repository (git commit):

Answer 1 is not descriptive enough, and the purpose of the commit is unclear; and answer 2 is redundant to using “git diff” to see what changed in this commit; but answer 3 is good: short, descriptive, and imperative.
Committing Changes to Git
Which command(s) below would save the changes of myfile.txt to my local Git repository?
Option 1git commit -m "my recent changes"
Option 2git init myfile.txt git commit -m "my recent changes
Option 3git add myfile.txt git commit -m "my recent changes"
Option 4git commit -m myfile.txt "my recent changes"
- Would only create a commit if files have already been staged.
- Would try to create a new repository.
- Is correct: first add the file to the staging area, then commit.
- Would try to commit a file “my recent changes” with the message myfile.txt.
Committing Multiple Files
The staging area can hold changes from any number of files that you want to commit as a single snapshot.
- Add some text to
mars.txtnoting your decision to consider Venus as a base - Create a new file
venus.txtwith your initial thoughts about Venus as a base for you and your friends - Add changes from both files to the staging area, and commit those changes.
The output below from cat mars.txt reflects only content added during this exercise. Your output may vary. First we make our changes to the mars.txt and venus.txt files:
BASH
nano mars.txt
cat mars.txt
OUTPUT
Maybe I should start with a base on Venus.BASH
nano venus.txt
cat venus.txt
OUTPUT
Venus is a nice planet and I definitely should consider it as a base.Now you can add both files to the staging area. We can do that in one line:
BASH
git add mars.txt venus.txtOr with multiple commands:
BASH
git add mars.txt
git add venus.txt
Now the files are ready to commit. You can check that using git status. If you are ready to commit use:
BASH
git commit -m "Write plans to start a base on Venus"OUTPUT
[main cc127c2]
 Write plans to start a base on Venus
 2 files changed, 2 insertions(+)
 create mode 100644 venus.txt
Key Points
-
git statusshows the status of a repository. - Files can be stored in a project’s working directory (which users see), the staging area (where the next commit is being built up) and the local repository (where commits are permanently recorded).
-
git addputs files in the staging area. -
git commitsaves the staged content as a new commit in the local repository. - Write a commit message that accurately describes your changes.
Content from Exploring History
Last updated on 2024-03-12 | Edit this page
Overview
Questions
- How can I identify old versions of files?
- How do I review my changes?
- How can I recover old versions of files?
Objectives
- Explain what the HEAD of a repository is and how to use it.
- Identify and use Git commit numbers.
- Compare various versions of tracked files.
- Restore old versions of files.
As we saw in the previous episode, we can refer to commits by their identifiers. You can refer to the most recent commit of the working directory by using the identifier HEAD.
We’ve been adding one line at a time to mars.txt, so it’s easy to track our progress by looking, so let’s do that using our HEADs. Before we start, let’s make a change to mars.txt, adding yet another line.
BASH
nano mars.txt
cat mars.txt
OUTPUT
Cold and dry, but everything is my favorite color
The two moons may be a problem for Wolfman
But the Mummy will appreciate the lack of humidity
An ill-considered change
Now, let’s see what we get.
BASH
git diff HEAD mars.txtOUTPUT
diff --git a/mars.txt b/mars.txt
index b36abfd..0848c8d 100644
--- a/mars.txt
+++ b/mars.txt
@@ -1,3 +1,4 @@
 Cold and dry, but everything is my favorite color
 The two moons may be a problem for Wolfman
 But the Mummy will appreciate the lack of humidity
+An ill-considered change.
which is the same as what you would get if you leave out HEAD (try it). The real goodness in all this is when you can refer to previous commits. We do that by adding ~1 (where “~” is “tilde”, pronounced [til-duh]) to refer to the commit one before HEAD.
git diff HEAD~1 mars.txtIf we want to see the differences between older commits we can use git diff again, but with the notation HEAD~1, HEAD~2, and so on, to refer to them:
git diff HEAD~3 mars.txtOUTPUT
diff --git a/mars.txt b/mars.txt
index df0654a..b36abfd 100644
--- a/mars.txt
+++ b/mars.txt
@@ -1 +1,4 @@
 Cold and dry, but everything is my favorite color
+The two moons may be a problem for Wolfman
+But the Mummy will appreciate the lack of humidity
+An ill-considered change
We could also use git show which shows us what changes we made at an older commit as well as the commit message, rather than the differences between a commit and our working directory that we see by using git diff.
git show HEAD~3 mars.txtOUTPUT
commit f22b25e3233b4645dabd0d81e651fe074bd8e73b
Author: Vlad Dracula <vlad@tran.sylvan.ia>
Date:   Thu Aug 22 09:51:46 2013 -0400

    Start notes on Mars as a base

diff --git a/mars.txt b/mars.txt
new file mode 100644
index 0000000..df0654a
--- /dev/null
+++ b/mars.txt
@@ -0,0 +1 @@
+Cold and dry, but everything is my favorite color
In this way, we can build up a chain of commits. The most recent end of the chain is referred to as HEAD; we can refer to previous commits using the ~ notation, so HEAD~1 means “the previous commit”, while HEAD~123 goes back 123 commits from where we are now.
We can also refer to commits using those long strings of digits and letters that git log displays. These are unique IDs for the changes, and “unique” really does mean unique: every change to any set of files on any computer has a unique 40-character identifier. Our first commit was given the ID f22b25e3233b4645dabd0d81e651fe074bd8e73b, so let’s try this:
git diff f22b25e3233b4645dabd0d81e651fe074bd8e73b mars.txtOUTPUT
diff --git a/mars.txt b/mars.txt
index df0654a..93a3e13 100644
--- a/mars.txt
+++ b/mars.txt
@@ -1 +1,4 @@
 Cold and dry, but everything is my favorite color
+The two moons may be a problem for Wolfman
+But the Mummy will appreciate the lack of humidity
+An ill-considered change
That’s the right answer, but typing out random 40-character strings is annoying, so Git lets us use just the first few characters (typically seven for normal size projects):
git diff f22b25e mars.txtOUTPUT
diff --git a/mars.txt b/mars.txt
index df0654a..93a3e13 100644
--- a/mars.txt
+++ b/mars.txt
@@ -1 +1,4 @@
 Cold and dry, but everything is my favorite color
+The two moons may be a problem for Wolfman
+But the Mummy will appreciate the lack of humidity
+An ill-considered change
All right! So we can save changes to files and see what we’ve changed. Now, how can we restore older versions of things? Let’s suppose we change our mind about the last update to mars.txt (the “ill-considered change”).
git status now tells us that the file has been changed, but those changes haven’t been staged:
git statusOUTPUT
On branch main
Changes not staged for commit:
  (use "git add <file>..." to update what will be committed)
  (use "git checkout -- <file>..." to discard changes in working directory)

    modified:   mars.txt

no changes added to commit (use "git add" and/or "git commit -a")
We can put things back the way they were by using git checkout:
git checkout HEAD mars.txt
cat mars.txt
OUTPUT
Cold and dry, but everything is my favorite color
The two moons may be a problem for Wolfman
But the Mummy will appreciate the lack of humidity
As you might guess from its name, git checkout checks out (i.e., restores) an old version of a file. In this case, we’re telling Git that we want to recover the version of the file recorded in HEAD, which is the last saved commit. If we want to go back even further, we can use a commit identifier instead:
BASH
git checkout f22b25e mars.txtBASH
cat mars.txtOUTPUT
Cold and dry, but everything is my favorite colorBASH
git statusOUTPUT
On branch main
Changes to be committed:
  (use "git reset HEAD <file>..." to unstage)

    modified:   mars.txt
Notice that the changes are currently in the staging area. Again, we can put things back the way they were by using git checkout:
BASH
git checkout HEAD mars.txtDon’t Lose Your HEAD
Above we used
BASH
git checkout f22b25e mars.txtto revert mars.txt to its state after the commit f22b25e. But be careful! The command checkout has other important functionalities and Git will misunderstand your intentions if you are not accurate with the typing. For example, if you forget mars.txt in the previous command.
BASH
git checkout f22b25eERROR
Note: checking out 'f22b25e'.

You are in 'detached HEAD' state. You can look around, make experimental
changes and commit them, and you can discard any commits you make in this
state without impacting any branches by performing another checkout.

If you want to create a new branch to retain commits you create, you may
do so (now or later) by using -b with the checkout command again. Example:

 git checkout -b <new-branch-name>

HEAD is now at f22b25e Start notes on Mars as a base
The “detached HEAD” is like “look, but don’t touch” here, so you shouldn’t make any changes in this state. After investigating your repo’s past state, reattach your HEAD with git checkout main.
It’s important to remember that we must use the commit number that identifies the state of the repository before the change we’re trying to undo. A common mistake is to use the number of the commit in which we made the change we’re trying to discard. In the example below, we want to retrieve the state from before the most recent commit (HEAD~1), which is commit f22b25e:

So, to put it all together, here’s how Git works in cartoon form:

Simplifying the Common Case
If you read the output of git status carefully, you’ll see that it includes this hint:
OUTPUT
(use "git checkout -- <file>..." to discard changes in working directory)As it says, git checkout without a version identifier restores files to the state saved in HEAD. The double dash -- is needed to separate the names of the files being recovered from the command itself: without it, Git would try to use the name of the file as the commit identifier.
The fact that files can be reverted one by one tends to change the way people organize their work. If everything is in one large document, it’s hard (but not impossible) to undo changes to the introduction without also undoing changes made later to the conclusion. If the introduction and conclusion are stored in separate files, on the other hand, moving backward and forward in time becomes much easier.
Recovering Older Versions of a File
Jennifer has made changes to the Python script that she has been working on for weeks, and the modifications she made this morning “broke” the script and it no longer runs. She has spent ~ 1hr trying to fix it, with no luck…
Luckily, she has been keeping track of her project’s versions using Git! Which commands below will let her recover the last committed version of her Python script called data_cruncher.py?
Option 1$ git checkout HEAD
Option 2$ git checkout HEAD data_cruncher.py
Option 3$ git checkout HEAD~1 data_cruncher.py
Option 4$ git checkout <unique ID of last commitdata_cruncher.py
Option 5
Both 2 and 4
The answer is Option 5 (both 2 and 4).
The checkout command restores files from the repository, overwriting the files in your working directory. Option 2 and 4 both restore the latest version in the repository of the file data_cruncher.py. Option 2 uses HEAD to indicate the latest, whereas option 4 uses the unique ID of the last commit, which is what HEAD means.
Option 3 gets the version of data_cruncher.py from the commit before HEAD, which is NOT what we wanted.
Option 1 can be dangerous! Without a filename, git checkout will restore all files in the current directory (and all directories below it) to their state at the commit specified. This command will restore data_cruncher.py to the latest commit version, but it will also restore any other files that are changed to that version, erasing any changes you may have made to those files! As discussed above, you are left in a detached HEAD state, and you don’t want to be there.
Reverting a Commit
Jennifer is collaborating with colleagues on her Python script. She realizes her last commit to the project’s repository contained an error, and wants to undo it. Jennifer wants to undo correctly so everyone in the project’s repository gets the correct change. The command git revert [erroneous commit ID] will create a new commit that reverses the erroneous commit.
The command git revert is different from git checkout [commit ID] because git checkout returns the files not yet committed within the local repository to a previous state, whereas git revert reverses changes committed to the local and project repositories.
Below are the right steps and explanations for Jennifer to use git revert, what is the missing command?
________ # Look at the git history of the project to find the commit ID- Copy the ID (the first few characters of the ID, e.g. 0b1d055).
git revert [commit ID]- Type in the new commit message.
- Save and close
The command git log lists project history with commit IDs.
The command git show HEAD shows changes made at the latest commit, and lists the commit ID; however, Jennifer should double-check it is the correct commit, and no one else has committed changes to the repository.
Understanding Workflow and History
What is the output of the last command in
BASH
cd planets
echo "Venus is beautiful and full of love" > venus.txt
git add venus.txt
echo "Venus is too hot to be suitable as a base" >> venus.txt
git commit -m "Comment on Venus as an unsuitable base"
git checkout HEAD venus.txt
cat venus.txt #this will print the contents of venus.txt to the screen
Option 1Venus is too hot to be suitable as a base
Option 2Venus is beautiful and full of love
Option 3Venus is beautiful and full of loveVenus is too hot to be suitable as a base
Option 4Error because you have changed venus.txt without committing the changes
The answer is option 2.
The command git add venus.txt places the current version of venus.txt into the staging area. The changes to the file from the second echo command are only applied to the working copy, not the version in the staging area.
So, when git commit -m "Comment on Venus as an unsuitable base" is executed, the version of venus.txt committed to the repository is the one from the staging area and has only one line.
At this time, the working copy still has the second line (and git status will show that the file is modified). However, git checkout HEAD venus.txt replaces the working copy with the most recently committed version of venus.txt.
So, cat venus.txt will output
OUTPUT
Venus is beautiful and full of love.Explore and Summarize Histories
Exploring history is an important part of Git, and often it is a challenge to find the right commit ID, especially if the commit is from several months ago.
Imagine the planets project has more than 50 files. You would like to find a commit that modifies some specific text in mars.txt. When you type git log, a very long list appeared. How can you narrow down the search?
Recall that the git diff command allows us to explore one specific file, e.g., git diff mars.txt. We can apply a similar idea here.
BASH
$ git log mars.txtUnfortunately some of these commit messages are very ambiguous, e.g., update files. How can you search through these files?
Both git diff and git log are very useful and they summarize a different part of the history for you. Is it possible to combine both? Let’s try the following:
BASH
$ git log --patch mars.txtYou should get a long list of output, and you should be able to see both commit messages andthe difference between each commit.
Question: What does the following command do?
BASH
git log --patch HEAD~9 *.txtContent from Ignoring Things
Last updated on 2024-03-12 | Edit this page
Overview
Questions
- How can I tell Git to ignore files I don’t want to track?
Objectives
- Configure Git to ignore specific files.
- Explain why ignoring files can be useful.
What if we have files that we do not want Git to track for us, like backup files created by our editor or intermediate files created during data analysis? Let’s create a few dummy files:
BASH
mkdir results
touch a.dat b.dat c.dat results/a.out results/b.out
and see what Git says:
BASH
git statusOUTPUT
On branch main
Untracked files:
  (use "git add <file>..." to include in what will be committed)

	a.dat
	b.dat
	c.dat
	results/

nothing added to commit but untracked files present (use "git add" to track)
Putting these files under version control would be a waste of disk space. What’s worse, having them all listed could distract us from changes that actually matter, so let’s tell Git to ignore them.
We do this by creating a file in the root directory of our project called .gitignore:
BASH
nano .gitignore
cat .gitignore
OUTPUT
*.dat
results/
These patterns tell Git to ignore any file whose name ends in .dat and everything in the results directory. (If any of these files were already being tracked, Git would continue to track them.)
Once we have created this file, the output of git status is much cleaner:
BASH
git statusOUTPUT
On branch main
Untracked files:
  (use "git add <file>..." to include in what will be committed)

	.gitignore

nothing added to commit but untracked files present (use "git add" to track)
The only thing Git notices now is the newly-created .gitignore file. You might think we wouldn’t want to track it, but everyone we’re sharing our repository with will probably want to ignore the same things that we’re ignoring. Let’s add and commit .gitignore:
BASH
git add .gitignore
git commit -m "Ignore data files and the results folder."
git status
OUTPUT
On branch main
nothing to commit, working directory clean
As a bonus, using .gitignore helps us avoid accidentally adding files to the repository that we don’t want to track:
BASH
git add a.datOUTPUT
The following paths are ignored by one of your .gitignore files:
a.dat
Use -f if you really want to add them.
If we really want to override our ignore settings, we can use git add -f to force Git to add something. For example, git add -f a.dat. We can also always see the status of ignored files if we want:
BASH
git status --ignoredOUTPUT
On branch main
Ignored files:
 (use "git add -f <file>..." to include in what will be committed)

        a.dat
        b.dat
        c.dat
        results/

nothing to commit, working directory cleanIf you only want to ignore the contents of results/plots, you can change your .gitignore to ignore only the /plots/ subfolder by adding the following line to your .gitignore:
OUTPUT
results/plots/This line will ensure only the contents of results/plots is ignored, and not the contents of results/data.
As with most programming issues, there are a few alternative ways that one may ensure this ignore rule is followed. The “Ignoring Nested Files: Variation” exercise has a slightly different directory structure that presents an alternative solution. Further, the discussion page has more detail on ignore rules.
You would add the following two lines to your .gitignore:
BASH
*.dat           # ignore all data files
!final.dat      # except final.data
The exclamation point operator will include a previously excluded entry.
Note also that because you’ve previously committed .dat files in this lesson they will not be ignored with this new rule. Only future additions of .dat files added to the root directory will be ignored.
Ignoring Nested Files: Variation
Given a directory structure that looks similar to the earlier Nested Files exercise, but with a slightly different directory structure:
BASH
results/data
results/images
results/plots
results/analysis
How would you ignore all of the contents in the results folder, but not results/data?
Hint: think a bit about how you created an exception with the ! operator before.
If you want to ignore the contents of results/ but not those of results/data/, you can change your .gitignore to ignore the contents of results folder, but create an exception for the contents of the results/data subfolder. Your .gitignore would look like this:
OUTPUT
results/*               # ignore everything in results folder
!results/data/ # do not ignore results/data/ contentsIgnoring all data Files in a Directory
Assuming you have an empty .gitignore file, and given a directory structure that looks like:
BASH
results/data/position/gps/a.dat
results/data/position/gps/b.dat
results/data/position/gps/c.dat
results/data/position/gps/info.txt
results/plots
What’s the shortest .gitignore rule you could write to ignore all .dat files in result/data/position/gps? Do not ignore the info.txt.
Appending results/data/position/gps/*.dat will match every file in results/data/position/gps that ends with .dat. The file results/data/position/gps/info.txt will not be ignored.
Ignoring all data Files in the repository
Let us assume you have many .dat files in different subdirectories of your repository. For example, you might have:
BASH
results/a.dat
data/experiment_1/b.dat
data/experiment_2/c.dat
data/experiment_2/variation_1/d.dat
How do you ignore all the .dat files, without explicitly listing the names of the corresponding folders?
In the .gitignore file, write:
OUTPUT
**/*.dat This will ignore all the .dat files, regardless of their position in the directory tree. You can still include some specific exception with the exclamation point operator.
The ! modifier will negate an entry from a previously defined ignore pattern. Because the !*.dat entry negates all of the previous .dat files in the .gitignore, none of them will be ignored, and all .dat files will be tracked.
Log Files
You wrote a script that creates many intermediate log-files of the form log_01, log_02, log_03, etc. You want to keep them but you do not want to track them through git.
- Write one
.gitignoreentry that excludes files of the formlog_01,log_02, etc. - Test your “ignore pattern” by creating some dummy files of the form
log_01, etc. - You find that the file
log_01is very important after all, add it to the tracked files without changing the.gitignoreagain. - Discuss with your neighbor what other types of files could reside in your directory that you do not want to track and thus would exclude via
.gitignore.
- append either
log_*orlog*as a new entry in your.gitignore - track
log_01usinggit add -f log_01
Content from Remotes in GitHub
Last updated on 2024-03-12 | Edit this page
Overview
Questions
- How do I share my changes with others on the web?
Objectives
- Explain what remote repositories are and why they are useful.
- Push to or pull from a remote repository.
Version control really comes into its own when we begin to collaborate with other people. We already have most of the machinery we need to do this; the only thing missing is to copy changes from one repository to another.
Systems like Git allow us to move work between any two repositories. In practice, though, it’s easiest to use one copy as a central hub, and to keep it on the web rather than on someone’s laptop. Most programmers use hosting services like GitHub, Bitbucket or GitLab to hold those main copies; we’ll explore the pros and cons of this in a later episode.
Let’s start by sharing the changes we’ve made to our current project with the world. To this end we are going to create a remote repository that will be linked to our local repository.
1. Create a remote repository
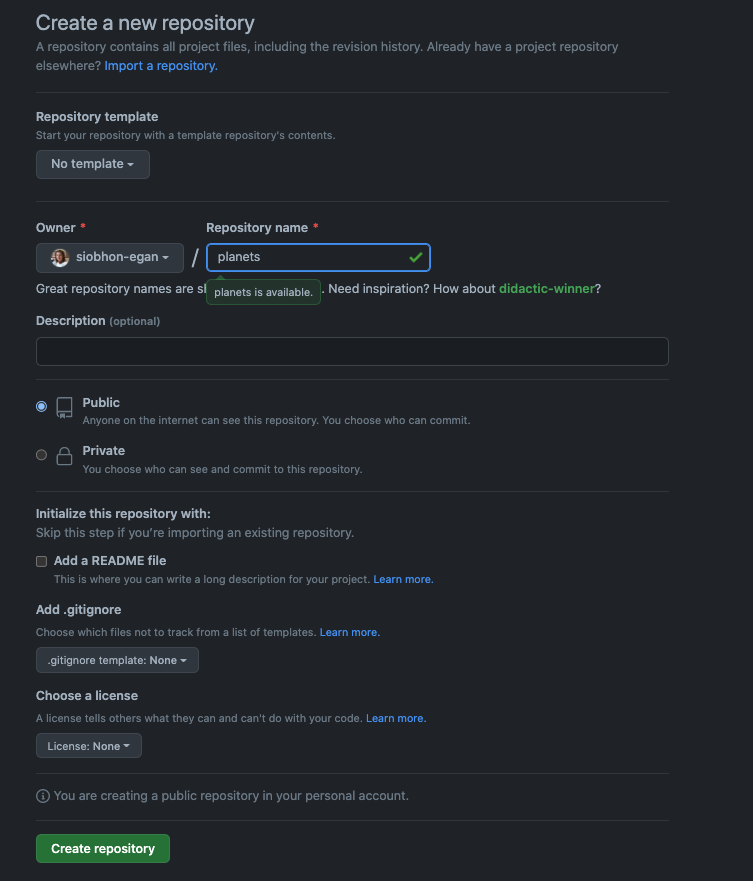
Log in to GitHub, then click on the icon in the top right corner to create a new repository.
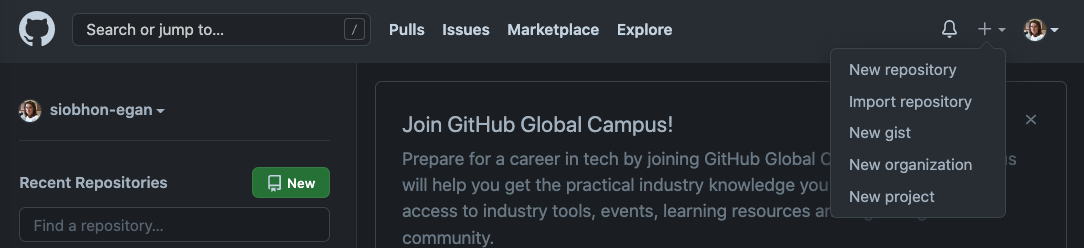
Name your repository planets and then click “Create Repository”.
Note: Since this repository will be connected to a local repository, it needs to be empty. Leave “Initialize this repository with a README” unchecked, and keep “None” as options for both “Add .gitignore” and “Add a license.” See the “GitHub License and README files” exercise below for a full explanation of why the repository needs to be empty.
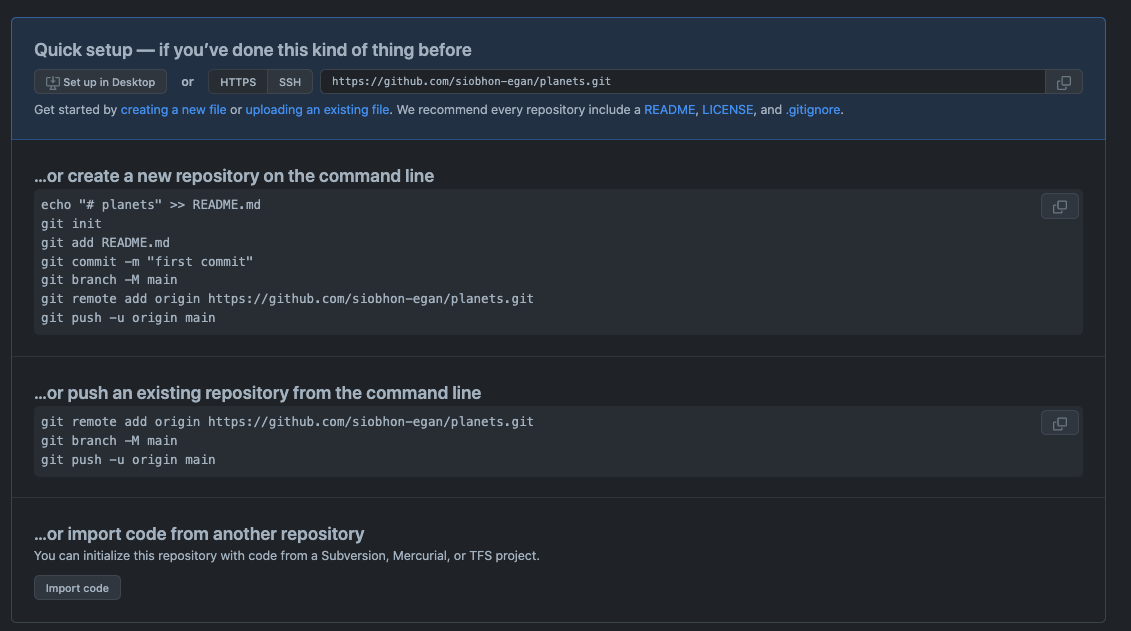
As soon as the repository is created, GitHub displays a page with a URL and some information on how to configure your local repository:
This effectively does the following on GitHub’s servers:
BASH
mkdir planets
cd planets
git init
If you remember back to the earlier episode where we added and committed our earlier work on mars.txt, we had a diagram of the local repository which looked like this:
Now that we have two repositories, we need a diagram like this:

Note that our local repository still contains our earlier work on mars.txt, but the remote repository on GitHub appears empty as it doesn’t contain any files yet.
2. Create a personal access token
🔗 Offical GitHub documentation
You can access repositories on GitHub from the command line in two ways, HTTPS and SSH, and both have a different way of authenticating. The method of authenticating is determined based on whether you choose an HTTPS or SSH remote URL when you clone the repository. For more information about which way to access, see “About remote repositories.”
Connecting to a repository will look like either:
- A HTTPS URL like https://github.com/user/repo.git - You can work with all repositories on GitHub over HTTPS, even if you are behind a firewall or proxy.
- A SSH URL, like git@github.com:user/repo.git - You can work with all repositories on GitHub over SSH, although firewalls and proxies might refuse to allow SSH connections.
In this workshop we will use the HTTPS option and connect using a “personal access token (PAT)”.
Git associates a remote URL with a name, and your default remote is usually called origin.
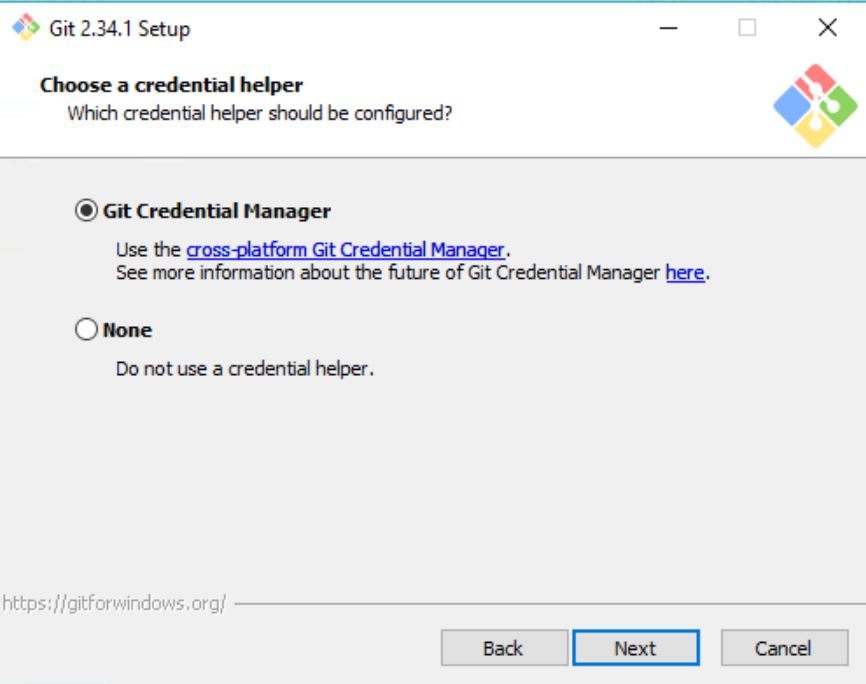
When you git clone, git fetch, git pull, or git push to a remote repository using HTTPS URLs on the command line, Git will ask for your GitHub username and password. When Git prompts you for your password, enter your personal access token (PAT). Alternatively, you can use a credential helper like Git Credential Manager. Password-based authentication for Git has been removed in favor of more secure authentication methods. For more information, see “Creating a personal access token.”
If you are accessing an organization that uses SAML SSO, you must also authorize your personal access token to access the organization before you authenticate. For more information, see “About authentication with SAML single sign-on” and “Authorizing a personal access token for use with SAML single sign-on.”
To get this processing going quicker we will get started by creating our own repositories and cloning them to the local machine.
Create Personal Access Token
🔗 Offical GitHub documentation
Personal access tokens (PATs) are an alternative to using passwords for authentication to GitHub when using the GitHub API or the command line.
- Verify your email address, if it hasn’t been verified yet.
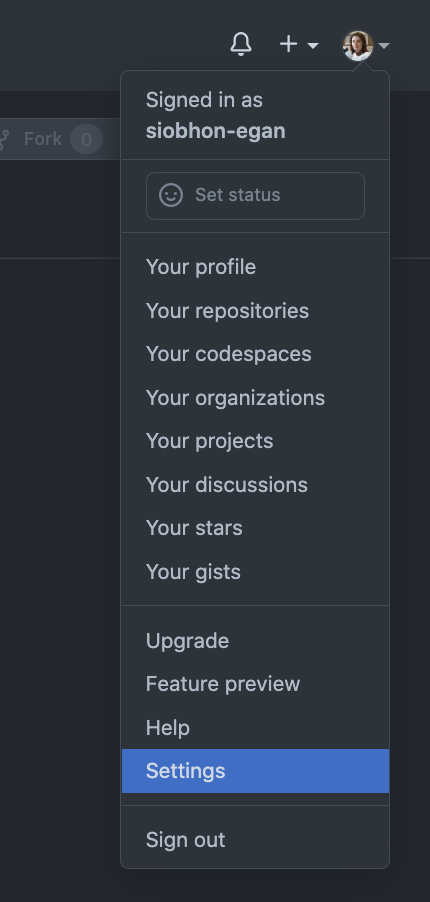
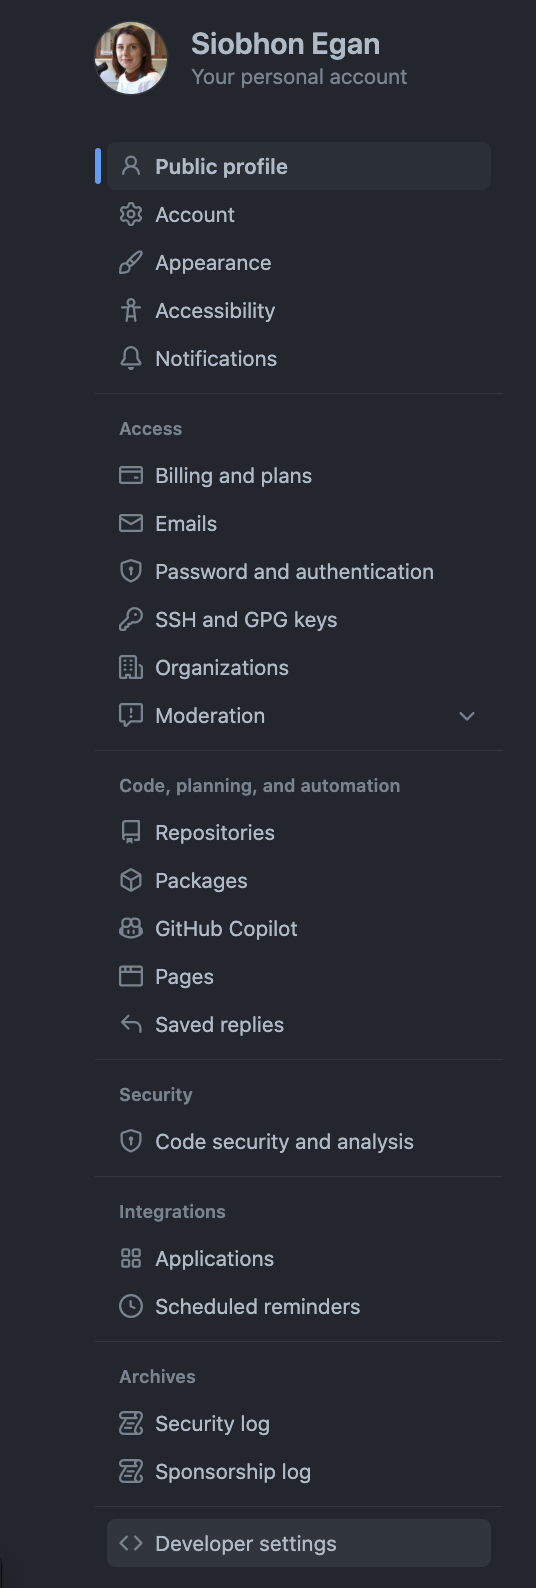
- In the upper-right corner of any page, click your profile photo, then select “Settings”.
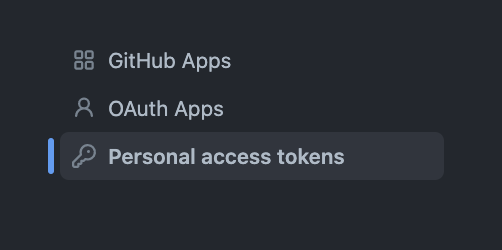
- In the left sidebar, select “Developer settings” (at the bottom of the list.
- In the left sidebar, select “Personal access tokens”.
- select “Generate new token”.

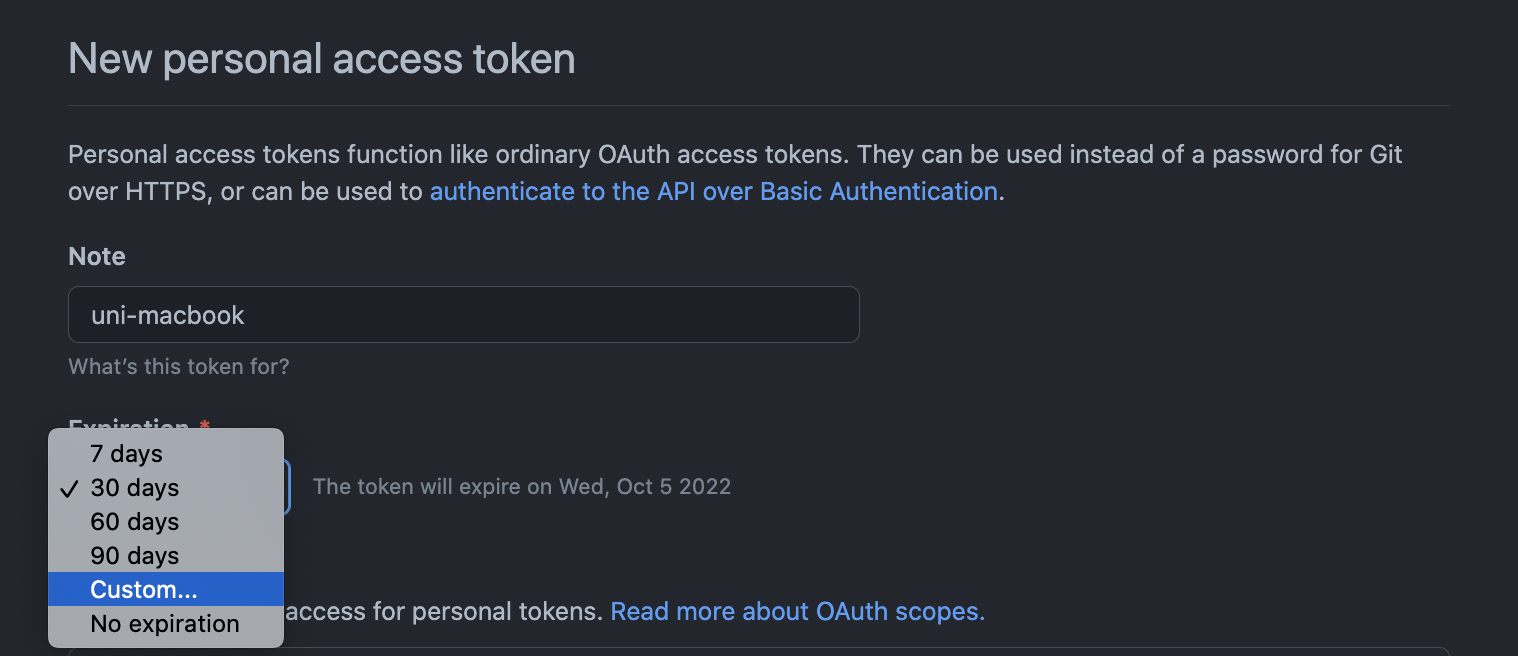
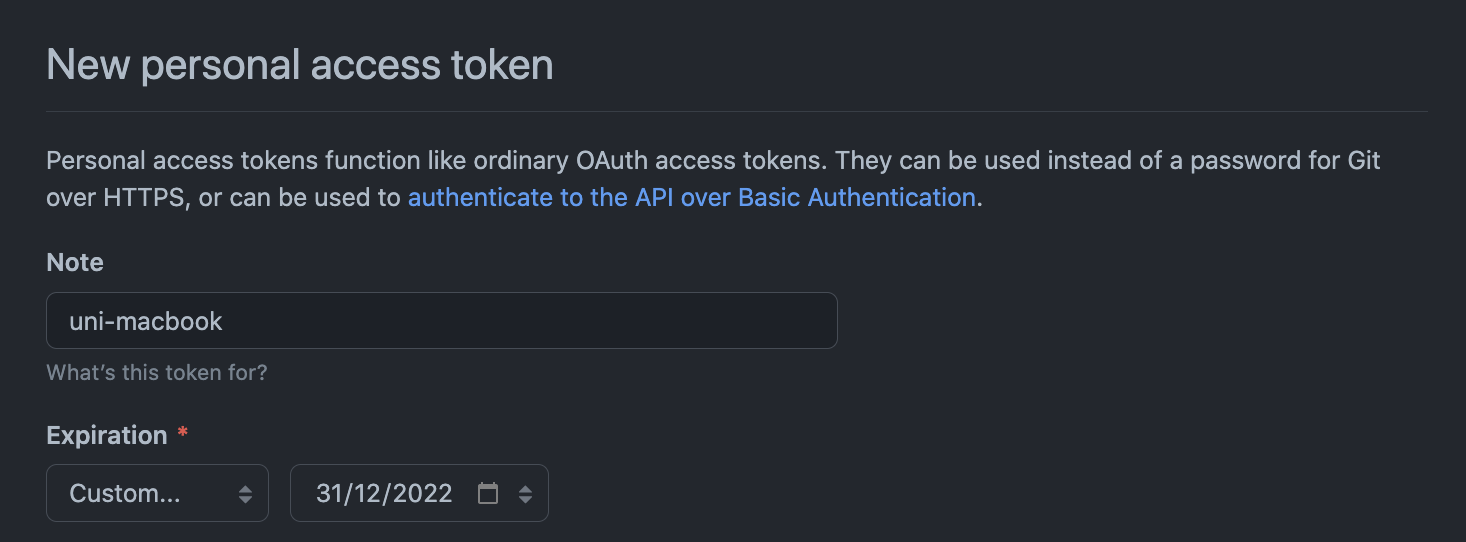
- Give your token a name - e.g. I used “uni-macbook” in this example.
- You need to provide an expiration for the token. It’s a personal choice but I suggest selecting something > 1 month. You may want to re-visit this tutorial in 2 weeks time for example and it will help you if your token is still valid. I suggest you select the Expiration drop-down menu and choose “custom”, then click a default or use the calendar picker (In the example below I selected end of the year 2022 for expiry)
- Select the scopes, or permissions, you’d like to grant this token. To use your token to access repositories from the command line, select repo.
-
Suggested options for selection:
- ✅ repo
- ✅ workflow
- ✅ admin:repo_hook
- ✅ gists
- ✅ notifications
- ✅ user
- ✅ project
- Click Generate token.

Once you have a token, you can enter it instead of your password when performing Git operations over HTTPS.
3. Connect local to remote repository
Now we connect the two repositories.
We do this by making the GitHub repository a remote for the local repository. The home page of the repository on GitHub includes the URL string we need to identify it:

Make sure you copy the HTTPS URL for cloining
Copy that URL from the browser, go into the local planets repository, and run this command:
BASH
git remote add origin https://github.com/vlad/planets.gitMake sure to use the URL for your repository rather than Vlad’s: the only difference should be your username instead of vlad.
origin is a local name used to refer to the remote repository. It could be called anything, but origin is a convention that is often used by default in git and GitHub, so it’s helpful to stick with this unless there’s a reason not to.
We can check that the command has worked by running git remote -v:
BASH
git remote -vOUTPUT
origin   https://github.com/vlad/planets.git (fetch)
origin   https://github.com/vlad/planets.git (push)
Securly Storing Your Personal Access Token
As a PAT is used in place of your password by default it will need to be re-entered whenever you push to the remote GitHub repository. It is recommended you use a password manager to store these credentials.
When your PAT expires you will need to ensure you update these saved credentials.
If you are not prompted for your username and password, your credentials may be cached on your computer. You should update your credentials to replace your old password with the token.
When you first push to the GitHub repository, you will be asked for a username and password. Provide your GitHub account username as the username and the PAT as the password. Once Git has successfully connected with the remote repository, the PAT will be automatically added to the Mac Keychain Access app. After this, there is no need to re-enter the PAT for future clone, push or pull actions.
If you need to update the credentials stored in the Mac Keychain Access app, these instructions are useful.
Alternatively you can use GitHub CLI or Git Credential Manager (GCM) to remember your credentials.
For Windows, the recommended option is to use the Git Credential Manager (GCM), which is included with GitBash (Git for Windows).
When you first push to a public GitHub repository, or clone a private GitHub repository, you will be prompted by the below window. Choose to login via “Token”, and enter your PAT.
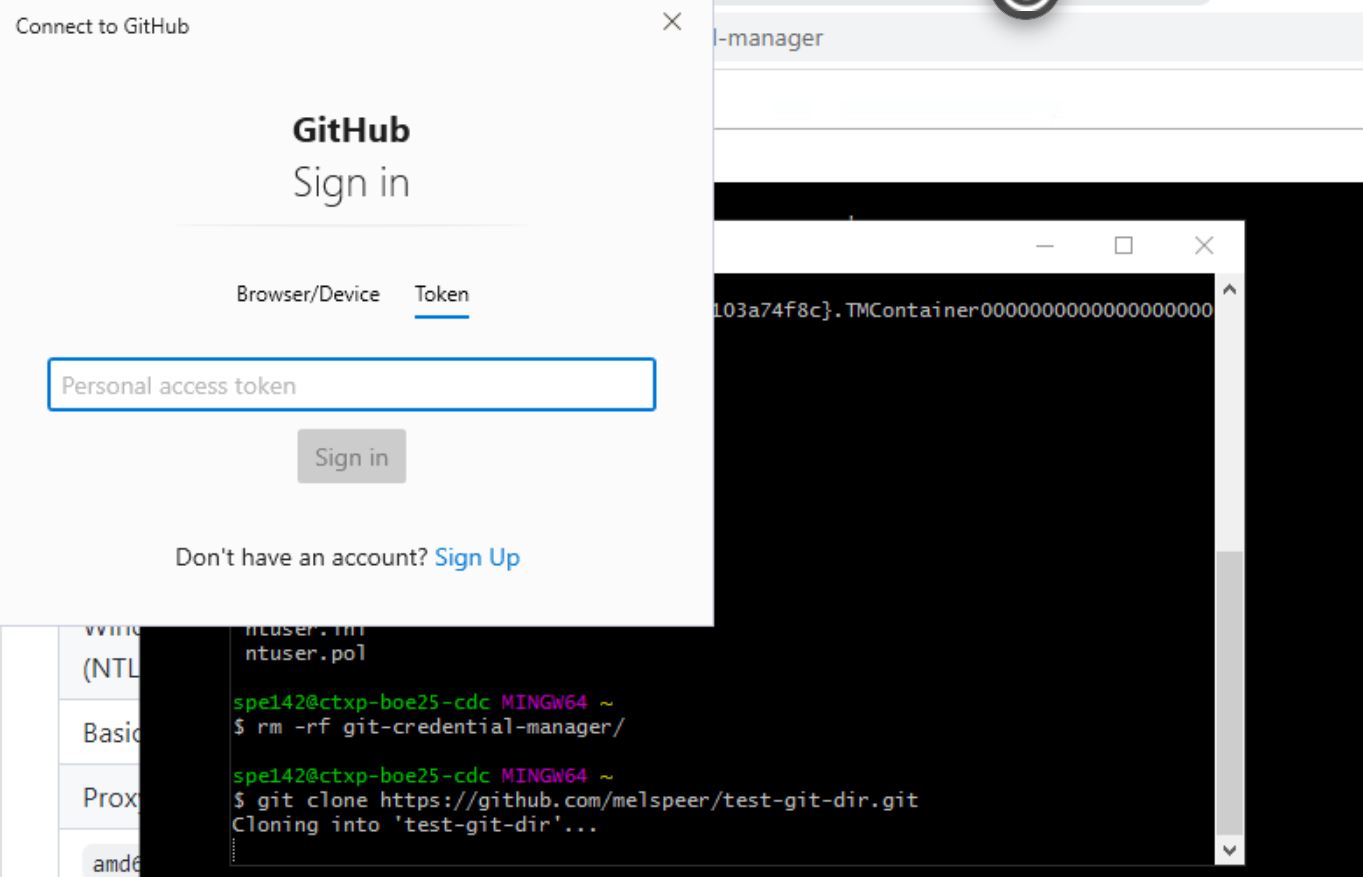
The GCM via GitBash automatically stores the entered PAT. In future cloning, pushing, or pulling the PAT will be automatically retrieved using the GCM.
Here you can find additional Instructions for GCM from the official GitHub Repository.
Linux (Ubuntu) users are recommended to use the GitHub Command Line Interface (GitHub CLI).
BASH
curl -fsSL https://cli.github.com/packages/githubcli-archive-keyring.gpg | sudo dd of=/usr/share/keyrings/githubcli-archive-keyring.gpg

echo "deb [arch=$(dpkg --print-architecture) signed-by=/usr/share/keyrings/githubcli-archive-keyring.gpg] https://cli.github.com/packages stable main" | sudo tee /etc/apt/sources.list.d/github-cli.list > /dev/null

sudo apt update

sudo apt install gh
Enter ‘gh auth login’ and follow the prompts. When prompted for your preferred protocol for Git operations, select HTTPS and, when asked if you would like to authenticate to Git with your GitHub credentials, enter Y.
Alternatively you can use GitHub CLI or Git Credential Manager (GCM) to remember your credentials.
4. Push local changes to a remote
Now that authentication is setup, we can return to the remote. This command will push the changes from our local repository to the repository on GitHub:
BASH
git push origin mainOUTPUT
Enumerating objects: 16, done.
Counting objects: 100% (16/16), done.
Delta compression using up to 8 threads.
Compressing objects: 100% (11/11), done.
Writing objects: 100% (16/16), 1.45 KiB | 372.00 KiB/s, done.
Total 16 (delta 2), reused 0 (delta 0)
remote: Resolving deltas: 100% (2/2), done.
To https://github.com/vlad/planets.git
 * [new branch]      main -> main
Branch error
If you get the following error it means your branch was not correctly set the branch to main during the third lesson.
ERROR
error: src refspec main does not match any
error: failed to push some refs to 'https://github.com/vlad/planets.git'To fix this first we need to change to the main branch this you will will need to change
BASH
git checkout -b mainOUTPUT
Switched to a new branch 'main'Then try to push again and it should work
BASH
git push origin mainOur local and remote repositories are now in this state:

The ‘-u’ Flag
You may see a -u option used with git push in some documentation. This option is synonymous with the --set-upstream-to option for the git branch command, and is used to associate the current branch with a remote branch so that the git pull command can be used without any arguments. To do this, simply use git push -u origin main once the remote has been set up.
We can pull changes from the remote repository to the local one as well:
BASH
git pull origin mainOUTPUT
From https://github.com/vlad/planets
 * branch            main     -> FETCH_HEAD
Already up-to-date.
Pulling has no effect in this case because the two repositories are already synchronized. If someone else had pushed some changes to the repository on GitHub, though, this command would download them to our local repository.
GitHub GUI
Browse to your planets repository on GitHub. Under the Code tab, find and click on the text that says “XX commits” (where “XX” is some number). Hover over, and click on, the three buttons to the right of each commit. What information can you gather/explore from these buttons? How would you get that same information in the shell?
The left-most button (with the picture of a clipboard) copies the full identifier of the commit to the clipboard. In the shell, git log will show you the full commit identifier for each commit.
When you click on the middle button, you’ll see all of the changes that were made in that particular commit. Green shaded lines indicate additions and red ones removals. In the shell we can do the same thing with git diff. In particular, git diff ID1..ID2 where ID1 and ID2 are commit identifiers (e.g. git diff a3bf1e5..041e637) will show the differences between those two commits.
The right-most button lets you view all of the files in the repository at the time of that commit. To do this in the shell, we’d need to checkout the repository at that particular time. We can do this with git checkout ID where ID is the identifier of the commit we want to look at. If we do this, we need to remember to put the repository back to the right state afterwards!
Uploading files directly in GitHub browser
Github also allows you to skip the command line and upload files directly to your repository without having to leave the browser. There are two options. First you can click the “Upload files” button in the toolbar at the top of the file tree. Or, you can drag and drop files from your desktop onto the file tree. You can read more about this on this GitHub page
GitHub Timestamp
Create a remote repository on GitHub. Push the contents of your local repository to the remote. Make changes to your local repository and push these changes. Go to the repo you just created on GitHub and check the timestamps of the files. How does GitHub record times, and why?
GitHub displays timestamps in a human readable relative format (i.e. “22 hours ago” or “three weeks ago”). However, if you hover over the timestamp, you can see the exact time at which the last change to the file occurred.
When we push changes, we’re interacting with a remote repository to update it with the changes we’ve made locally (often this corresponds to sharing the changes we’ve made with others). Commit only updates your local repository.
GitHub License and README files
In this episode we learned about creating a remote repository on GitHub, but when you initialized your GitHub repo, you didn’t add a README.md or a license file. If you had, what do you think would have happened when you tried to link your local and remote repositories?
In this case, we’d see a merge conflict due to unrelated histories. When GitHub creates a README.md file, it performs a commit in the remote repository. When you try to pull the remote repository to your local repository, Git detects that they have histories that do not share a common origin and refuses to merge.
BASH
git pull origin mainOUTPUT
warning: no common commits
remote: Enumerating objects: 3, done.
remote: Counting objects: 100% (3/3), done.
remote: Total 3 (delta 0), reused 0 (delta 0), pack-reused 0
Unpacking objects: 100% (3/3), done.
From https://github.com/vlad/planets
 * branch            main     -> FETCH_HEAD
 * [new branch]      main     -> origin/main
fatal: refusing to merge unrelated histories
You can force git to merge the two repositories with the option --allow-unrelated-histories. Be careful when you use this option and carefully examine the contents of local and remote repositories before merging.
BASH
git pull --allow-unrelated-histories origin mainOUTPUT
From https://github.com/vlad/planets
 * branch            main     -> FETCH_HEAD
Merge made by the 'recursive' strategy.
README.md | 1 +
1 file changed, 1 insertion(+)
create mode 100644 README.md
🖌 Collaborators!
You can add collaborators to repositories allowing them to contribute (i.e. push/pull).
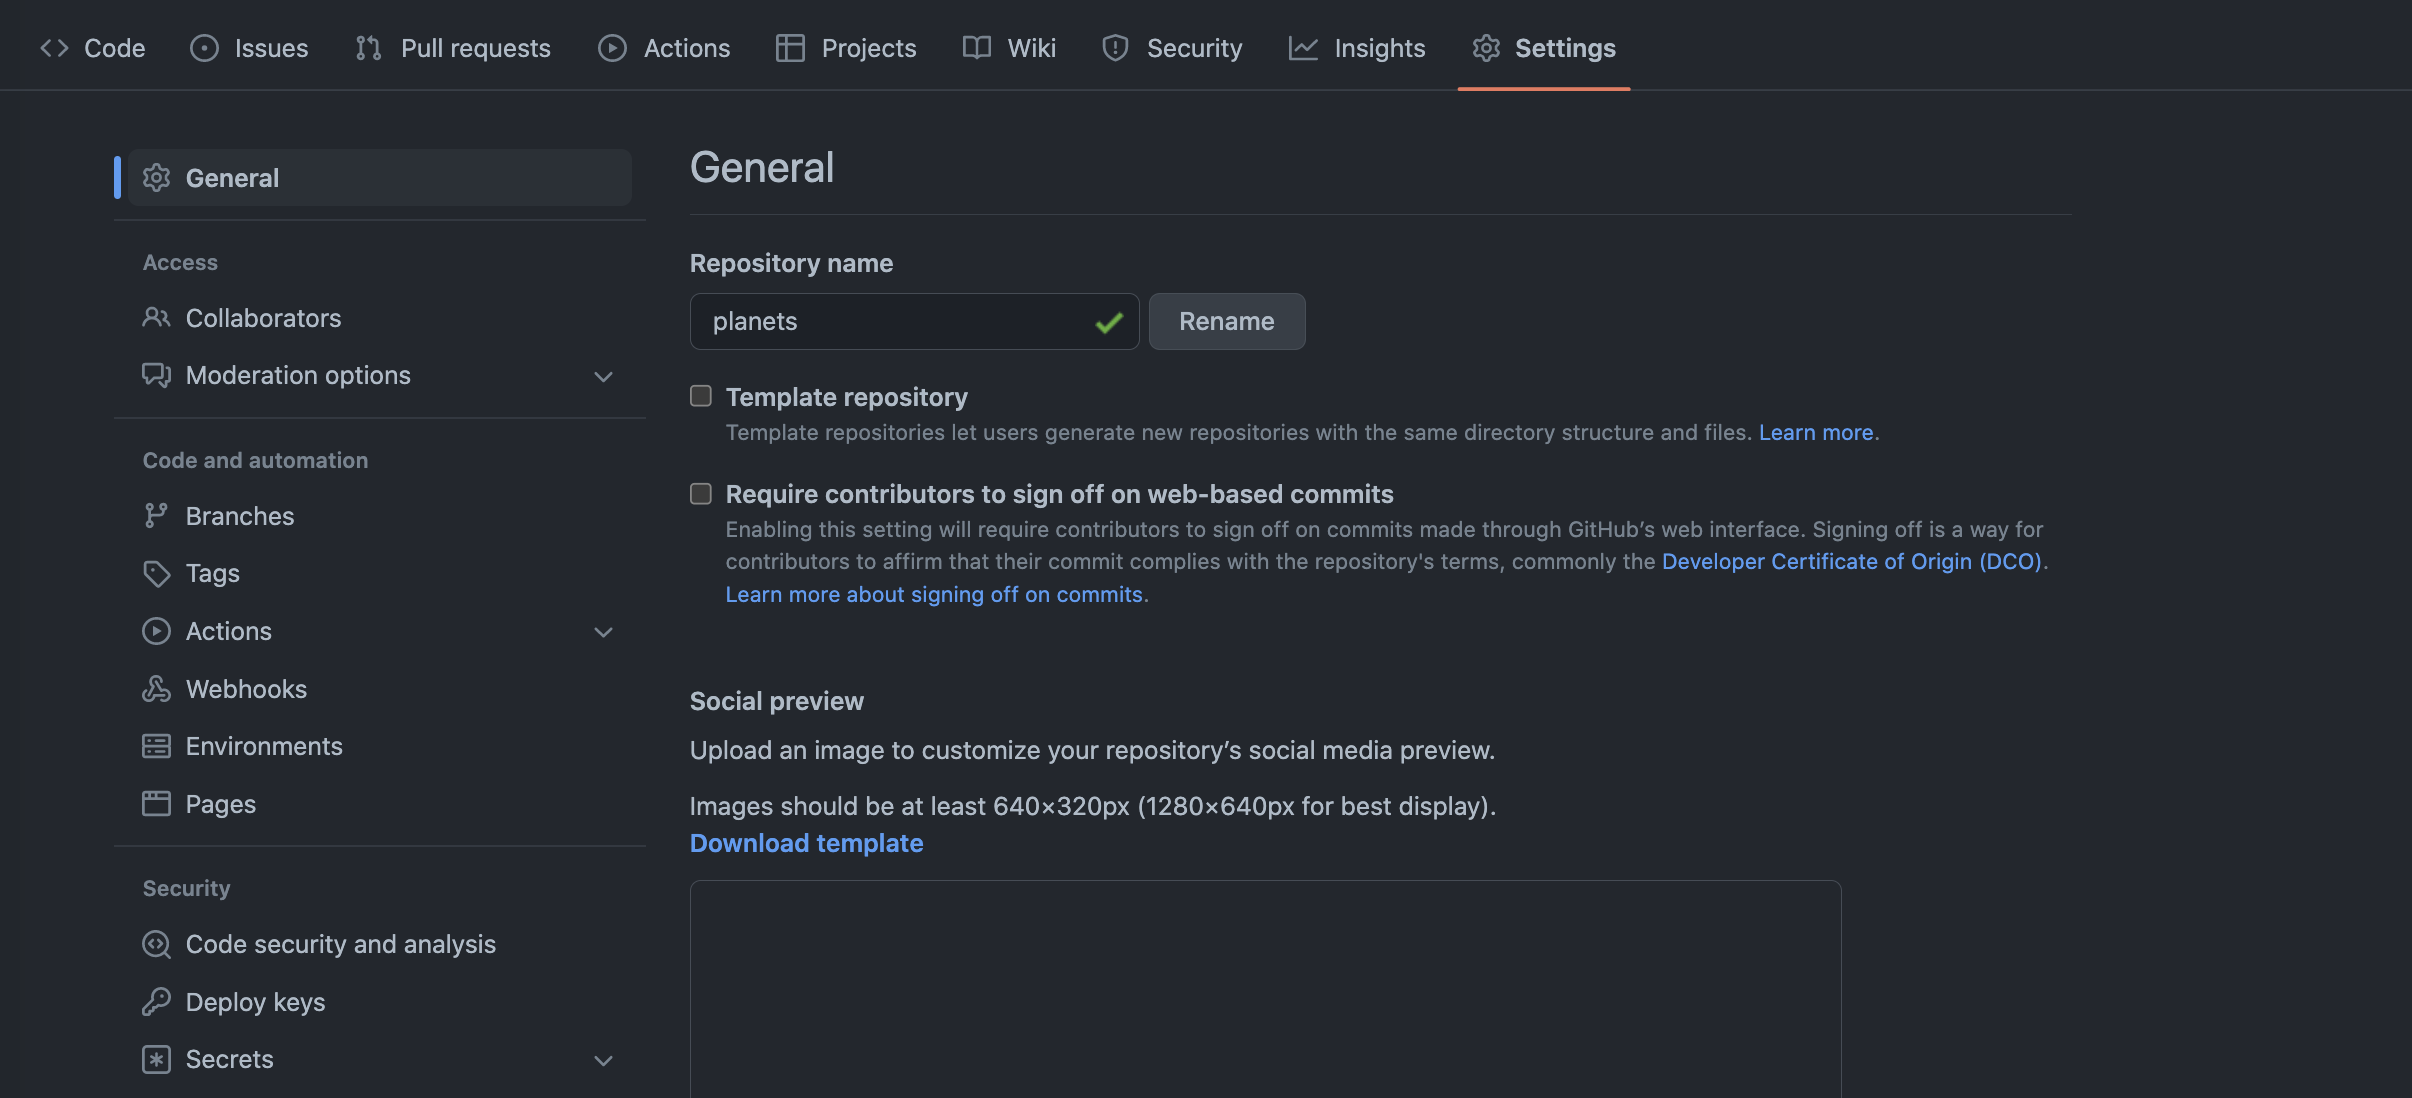
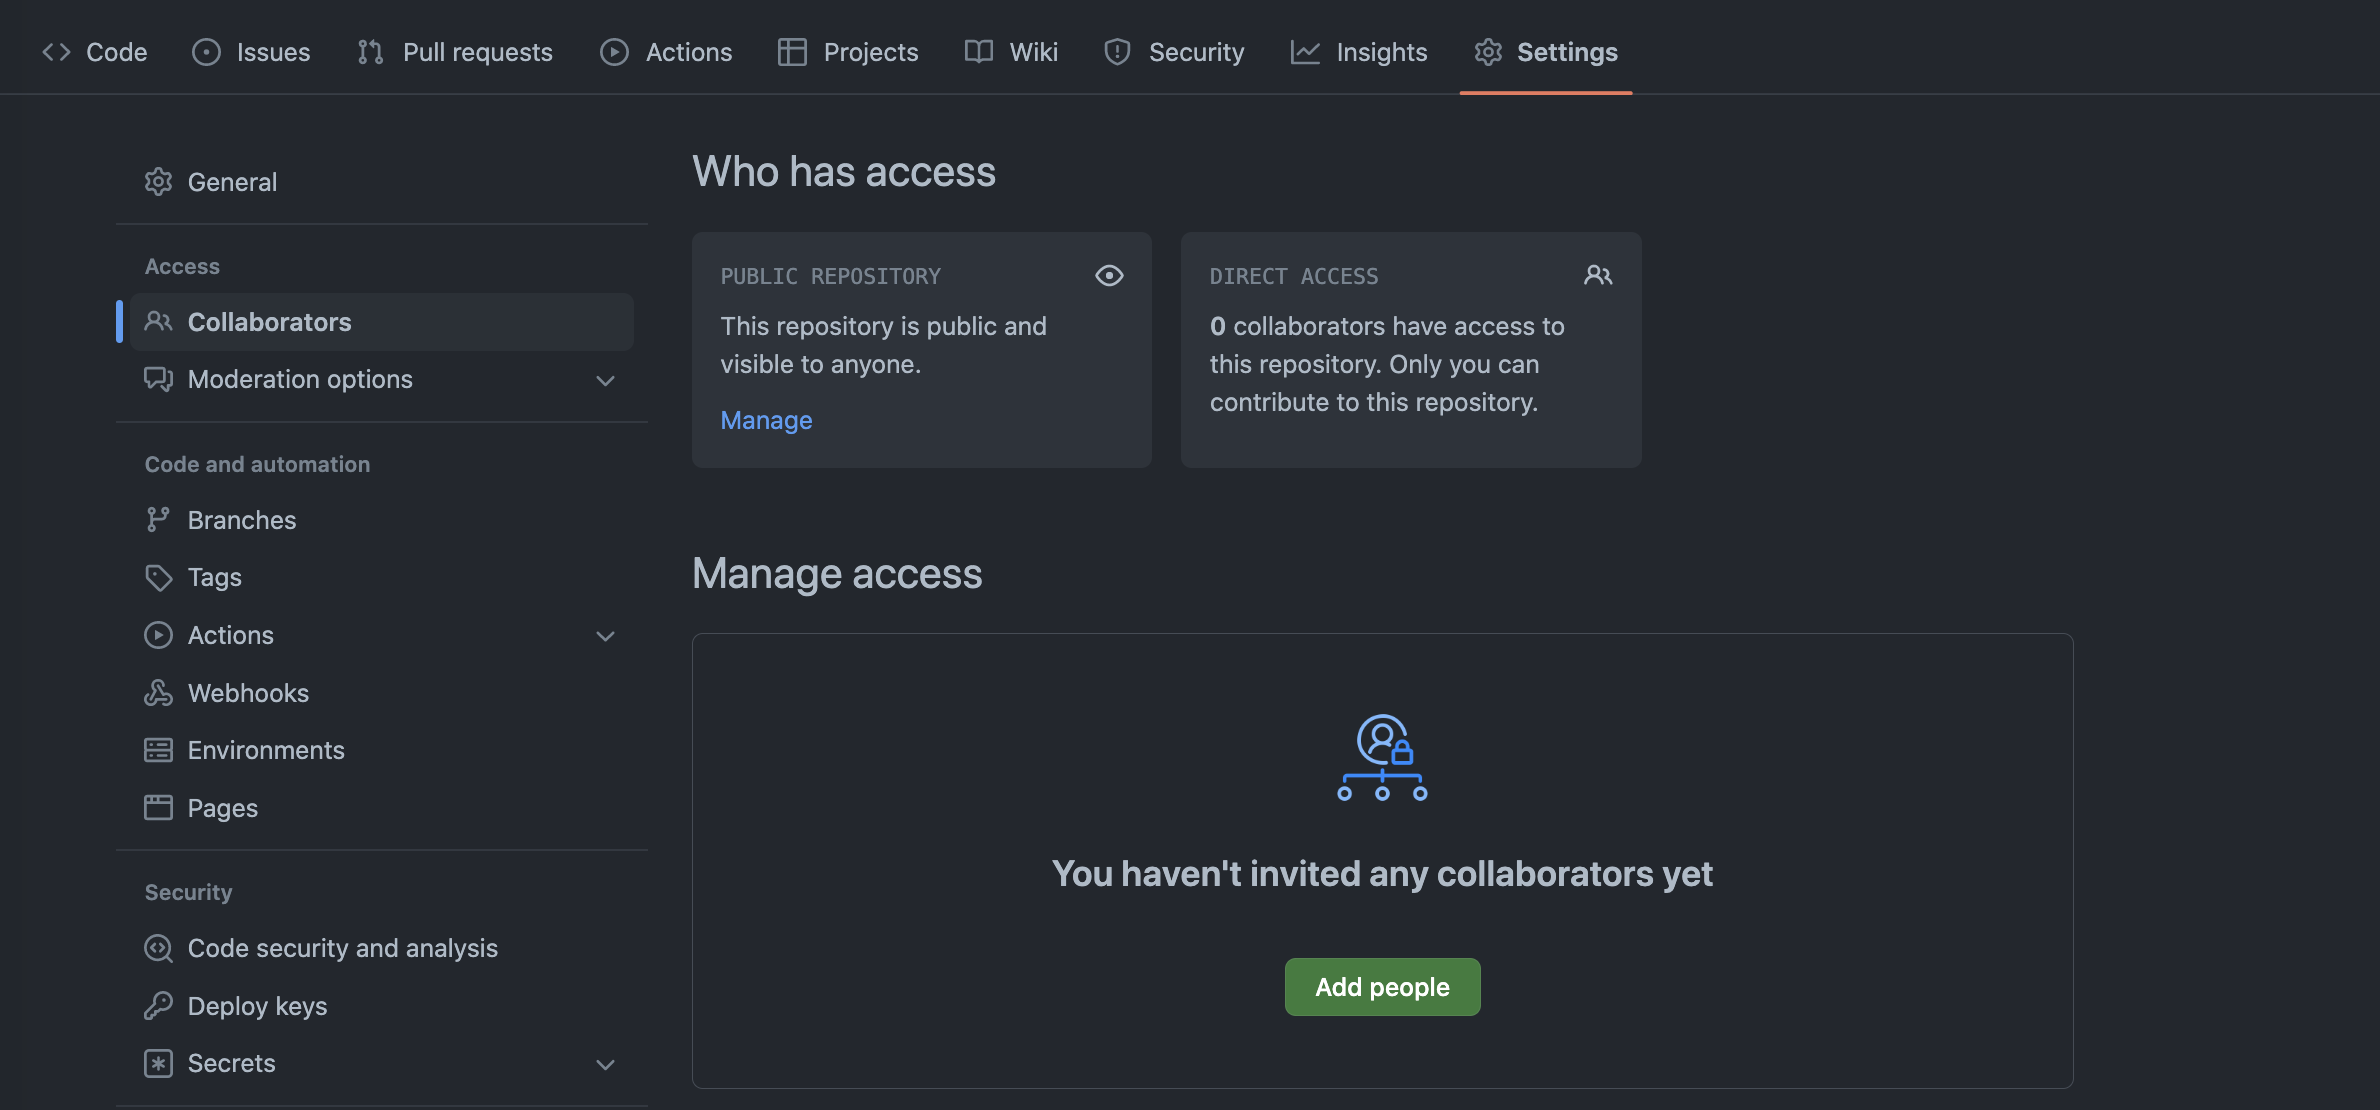
To do this navigate to your planets repository and click on the “Settings” tab on the far right hand side. Select “Collaborators” (under the ‘Access’ heading).
You can now add collaborators to the repository by searching their username or email address.
While we won’t have time to explore this in detail during this workshop you find more on collaborating here.
Key Points
- A local Git repository can be connected to one or more remote repositories.
- Authentication to GitHub via the command line can be via HTTPS and SSH - here we used Personal Access Token (PAT)
-
git pushcopies changes from a local repository to a remote repository. -
git pullcopies changes from a remote repository to a local repository.
Content from Wrap-up
Last updated on 2024-03-12 | Edit this page
Overview
Questions
- Where can I learn more about using git?
Objectives
- Be familiar with useful resources for git
RECAP
- The goal of this session is to become familiar with git and provide users with the confidence to use it in their study and work.
- After today you should have created a GitHub account and configured your computer to use git version control software.
- We stepped through an example that demonstrated the power of git version control in tracking history and changes.
- This workshop provided a practical and ‘hands-on’ introduction to git.
- We did not cover all aspects of version control/git theory but hope you can now begin to navigate the world of git after today.
- An important part of your git journey is learning how to navigate through online resources and find meaningful help.
Additional software carpentry lessons we did not cover today
We did not cover all lessons in the software carpentry suite today. After today’s workshop you may find it helpful to navigate your own way through the remainder of the lessons to sharpen your new git skills.
A list of additional git novice lessons:
Where to get help
- The GitHub Docs pages are a good place to start
- GitHub has ‘activities’ which aim to explain how git works
- GitHub also has interactive tutorials for their online version (Learning Labs) and for using Git offline (Git-It)
- Atlassian has in depth but clear tutorials on using git
- Additional episodes for this workshop can be found at the software carpentry lesson site for Version Control with Git
- Complete list of all git commands
References for git/GitHub
Git cheat sheets:
- Printable Git cheat sheets in several languages are available here (English version). More material is available from the GitHub training website.
- Tower client git cheat sheet
Resources
- An interactive one-page visualisation about the relationships between workspace, staging area, local repository, upstream repository, and the commands associated with each (with explanations).
- Both resources are also available in other languages (e.g. Spanish, French, and more).
- “Happy Git and GitHub for the useR” is an accessible, free online book by Jenny Bryan on how to setup and use Git and GitHub with specific references on the integration of Git with RStudio and working with Git in R.
- For RStudio users see the lesson on using GitHub from RStudio
- Open Scientific Code using Git and GitHub - A collection of explanations and short practical exercises to help researchers learn more about version control and open source software.
Help on error messages
These helpful coding tips have been inspired by Y. Wendy Huynh from R for Graduate Students…(p.s. yes I know we are using git and not R here, but many tips still apply 😄)
Some common mistakes to watch out for when coding
- Capitalization
- You typed an uppercase letter when you should have typed a lowercase letter (vice versa).
- Depending on the situation capitalization does not always matter but to be safe its best to make sure it does match.
- Mis-spelling
- Sounds obvious but might be surprised out often this is the problem (especially when starting out). Use the
tabauto-complete features where possible or the old copy-and-paste usually works.
- Sounds obvious but might be surprised out often this is the problem (especially when starting out). Use the
- Closing Punctuation
- Don’t forget to close any parentheses, bracket, or quotation if you use them.
Searching the web
As you navigate the world of code let me introduce you to your new bestfriend…Stack overflow. An excellent resource to find help on error messages for new and experienced users alike!
Everybody – beginner and expert alike – will Google how to code something at some point. The real skill that experts have over beginners is that experts know how to strategically Google. For that, you want to master these skills:
- Make sure that your question is specific and reproducible.
- Don’t forget to include the language/tool you are using e.g. “git”.
- Remove text which is specific to you (i.e. the name of your repository or file).
Searching an error message
You received the following error message and wanted to find help on the web. What parts would you put into a search engine?
ERROR
From https://github.com/siobhon-egan/planets
   1e7a65e..2b65923  master     -> origin/master
error: Your local changes to the following files would be overwritten by merge:
	myNewFile.sh
Please commit your changes or stash them before you merge.
Aborting- Including the first two lines of the output in the search won’t help, as the repository URL and commit log ID are unique to me.
- The third line (
error: Your local changes to the following files would be overwritten by merge:) tell us the type of error encountered here. This is probably going to be the most helpful to enter into a search engine. - The fourth line is just the name of my new file in the directory and won’t be helpful.
- The fifth line explains how to fix the error, but you may not know exactly the steps to do this. Searching for help on this line might also retrieve some useful tips
- Searches for the final line (
Aborting) probably won’t yield many useful results.
Key Points
- Keep a copy of GitHub cheat-sheet handy when starting out. PDF copy
- GitHub Docs pages is your go-to for extensive documentation.